This article teaches you Google Workspace to Microsoft Office 365 migration step-by-step procedure. It also explains the plans and pricing of Google Workspace and Microsoft 365. Google Workspace and Microsoft 365 are widely used cloud email clients offering multiple subscription-based plans. It depends on the user which platform they prefer. Some users like to use Google Workspace, while some use Microsoft 365. The competition between G-Suite and Microsoft 365 is high because both are very popular and offer the same services. This article describes a manual migration method from Google Workspace to Office 365.
Adding Domain in Microsoft 365 Account
Step 1. Log in to office.com using admin login credentials.
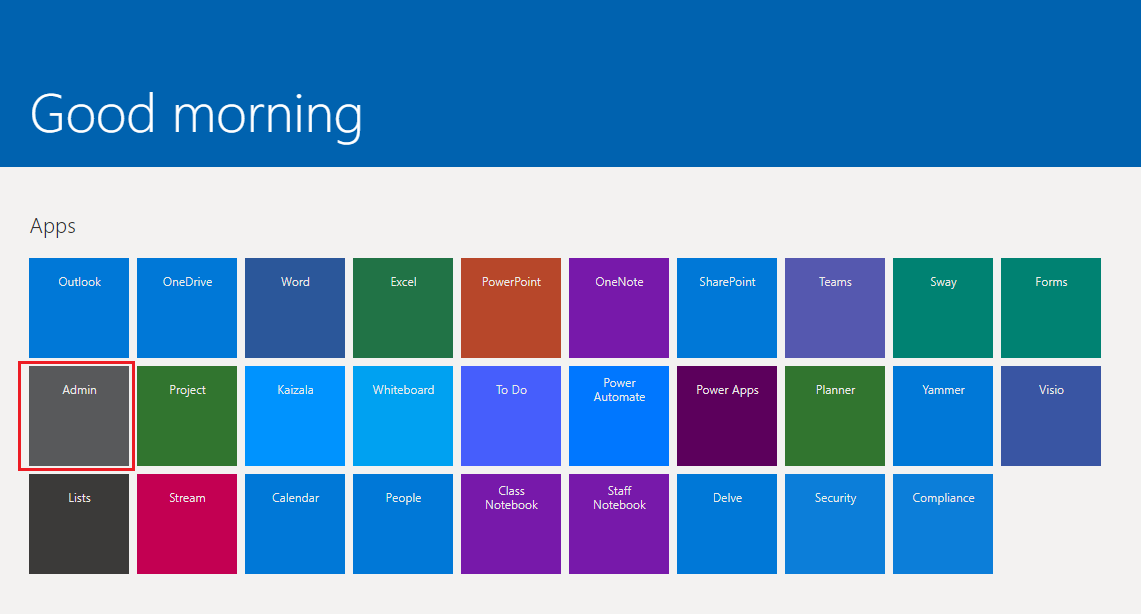
Step 2. Now choose Admin from the apps panel.
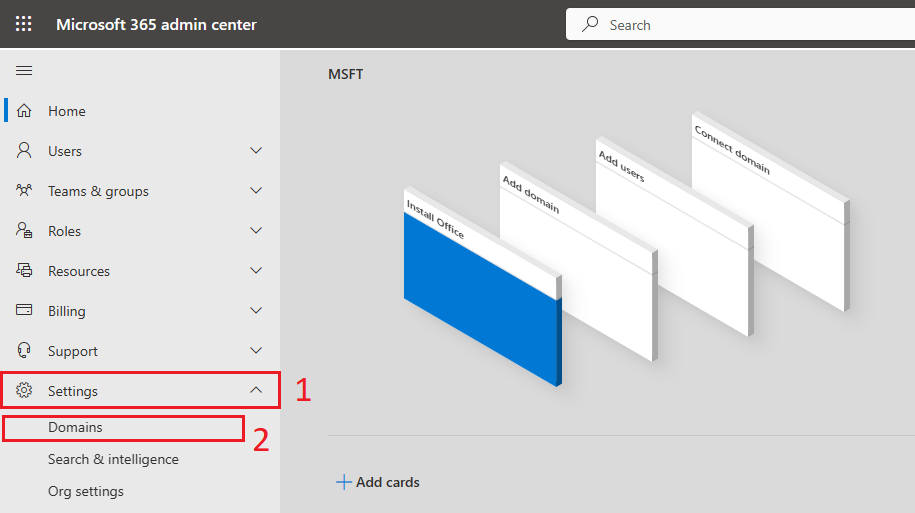
Step 3. Once you enter the Admin center, click on Settings and then Domain in the left sidebar.
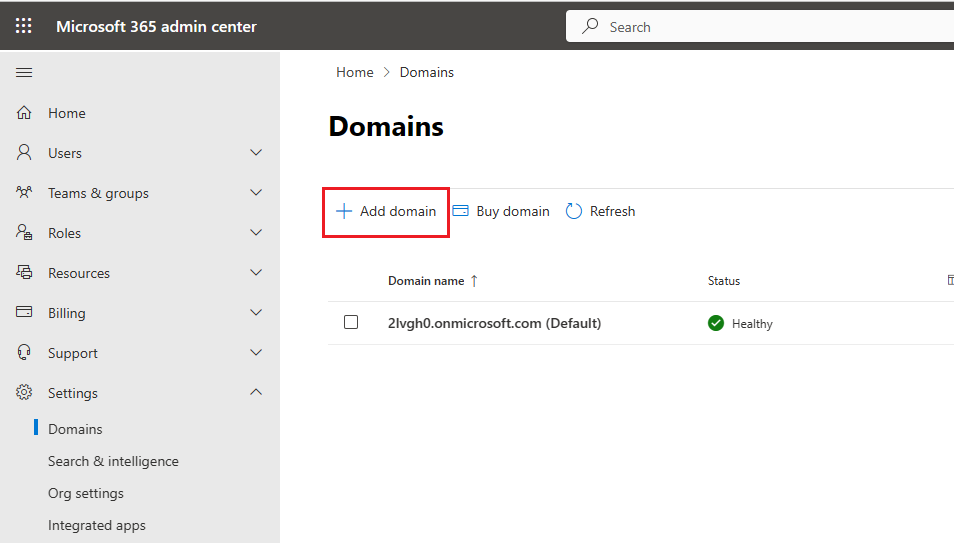
Step 4. Once you enter the Domains section, click on the Add Domain button to add your Google Workspace domain.
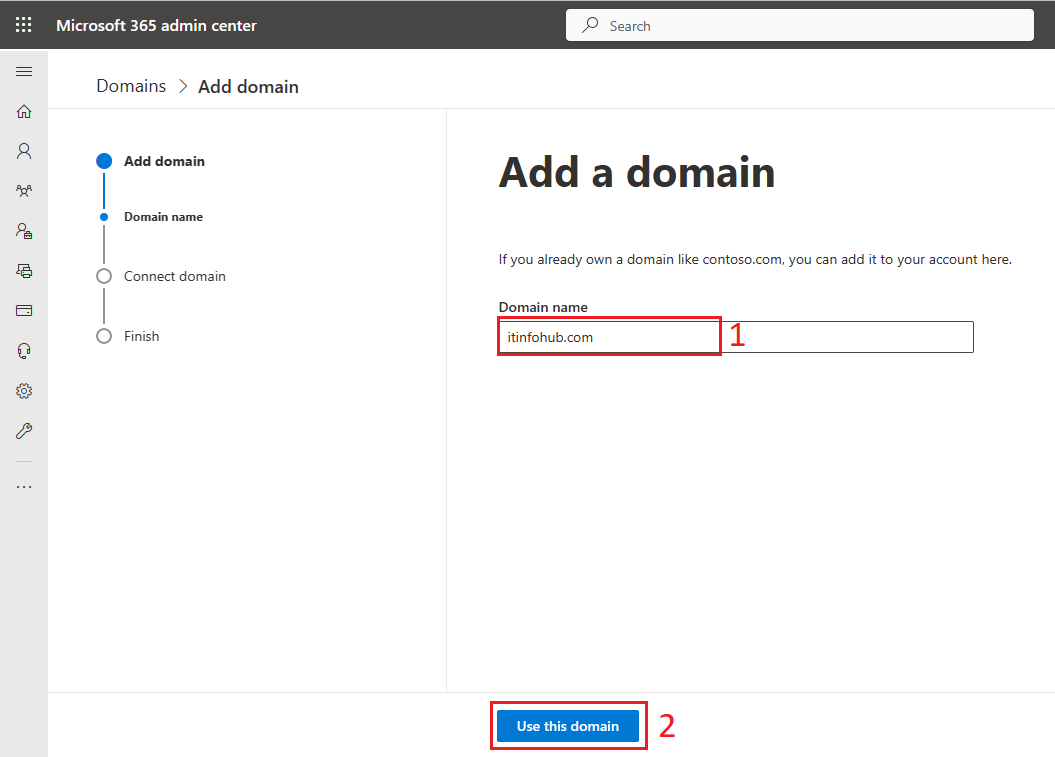
Step 5. Domain wizard will open, in the Domain name field - type your domain name and click on Use this domain.
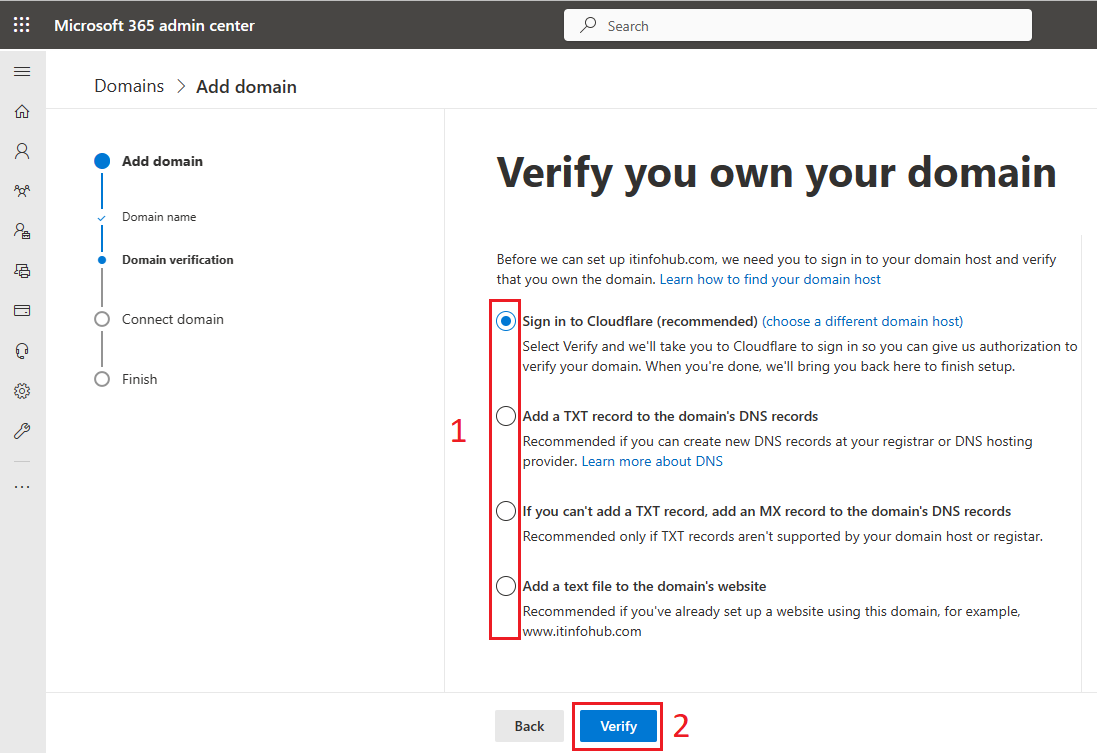
Step 6. Now you need to verify your domain. There are four options provided for verifying the domain ownership, you can choose the suitable one for yourself and then click on the verify button.
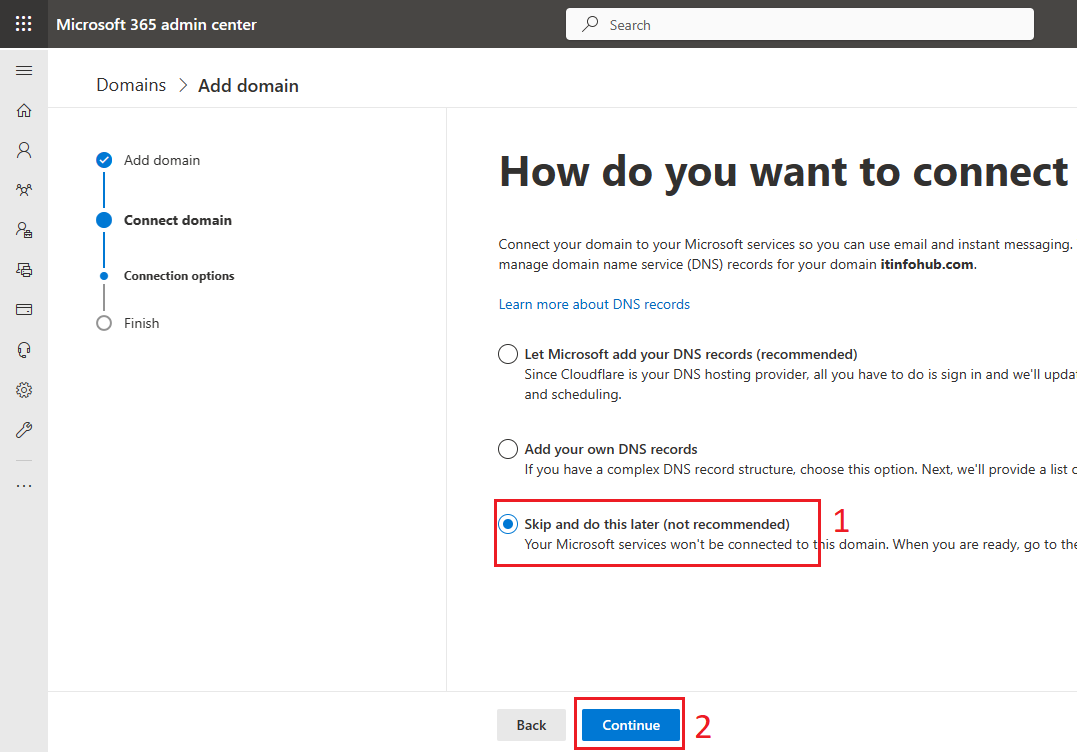
Step 7. Now it will ask you “How do you want to connect your domain?”, we need to choose - skip and do this later, and after that click on the continue button.
Note: We have skipped adding DNS records now but after finishing the migration we will do it.
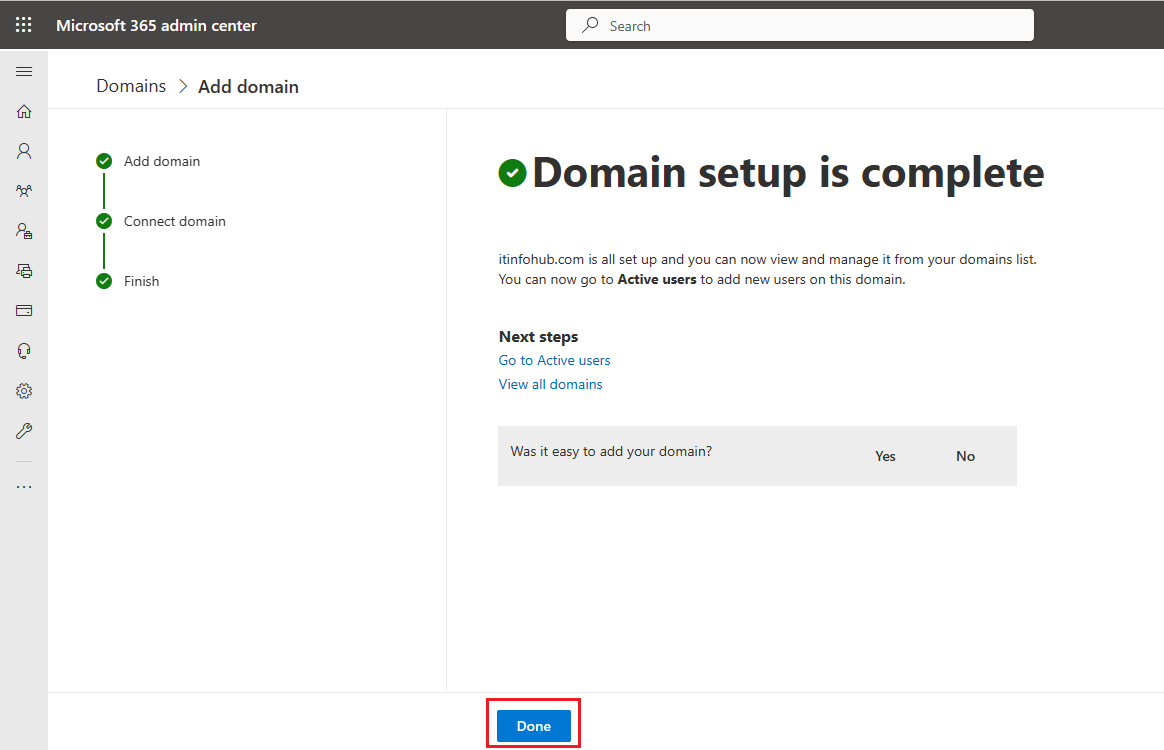
Step 8. Now you can see that the Domain setup is complete. Click on the done button.
Once you hit done button, you will see that your domain is added successfully and also set as default.
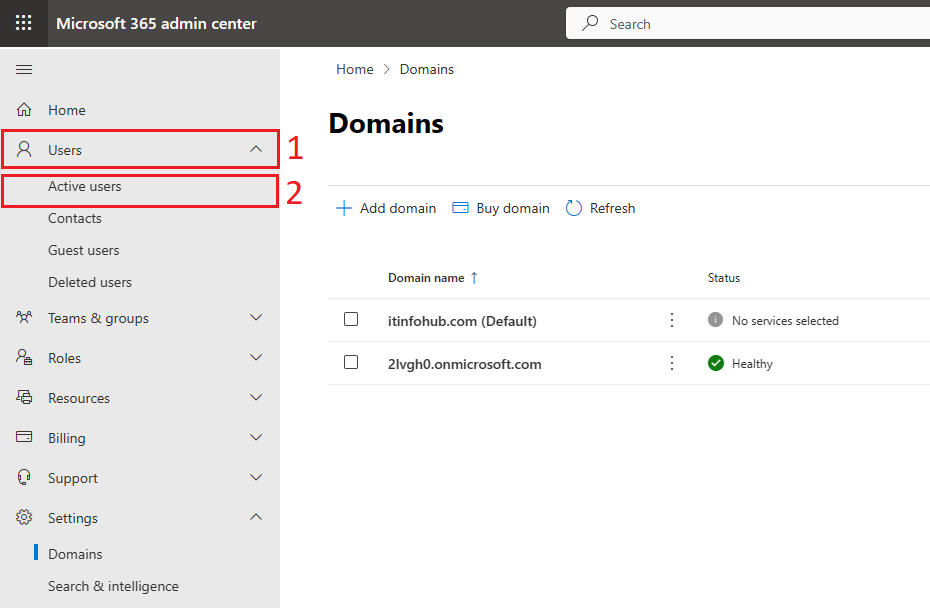
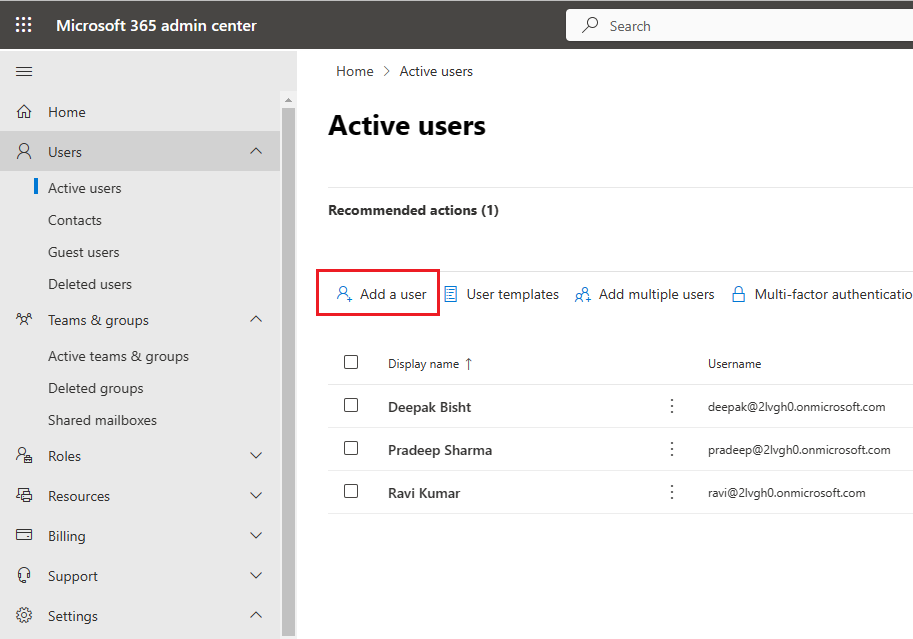
Steps 1. In the Microsoft 365 Admin Center, click on the Users then select active users to add the new users for the migration process.
Step 2. Once you enter the Active Users section, click on the Add a User button to add a new user.
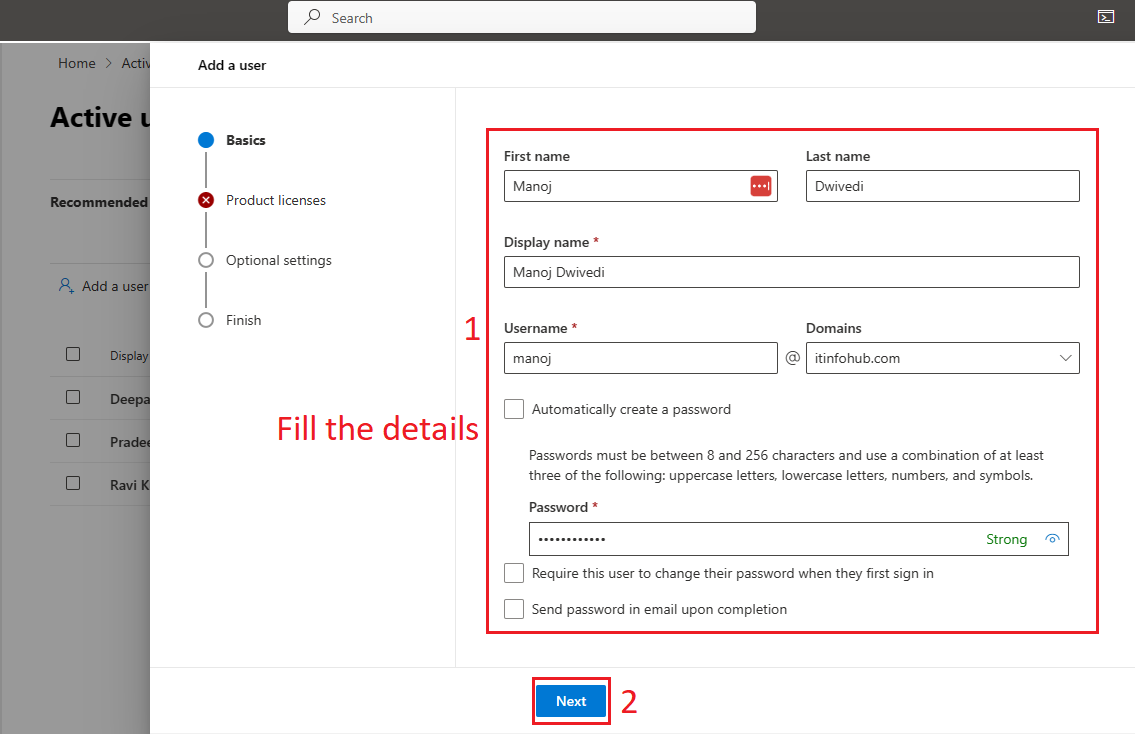
Step 3. Now fill some basic details like first name, last name, display name, username, and select your domain and uncheck all the options, type a password and click on the next button.
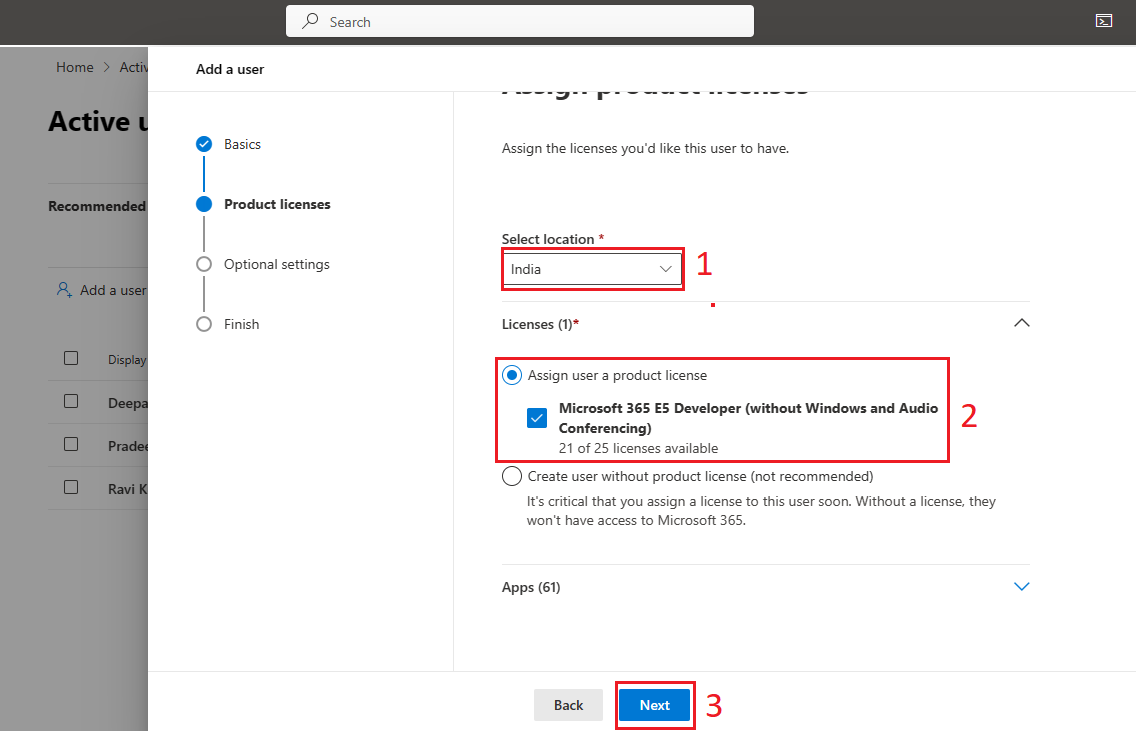
Step 4. Now you need to assign product licenses, in this window select your location. Choose Assign user a product license, select your license and click on the next button.
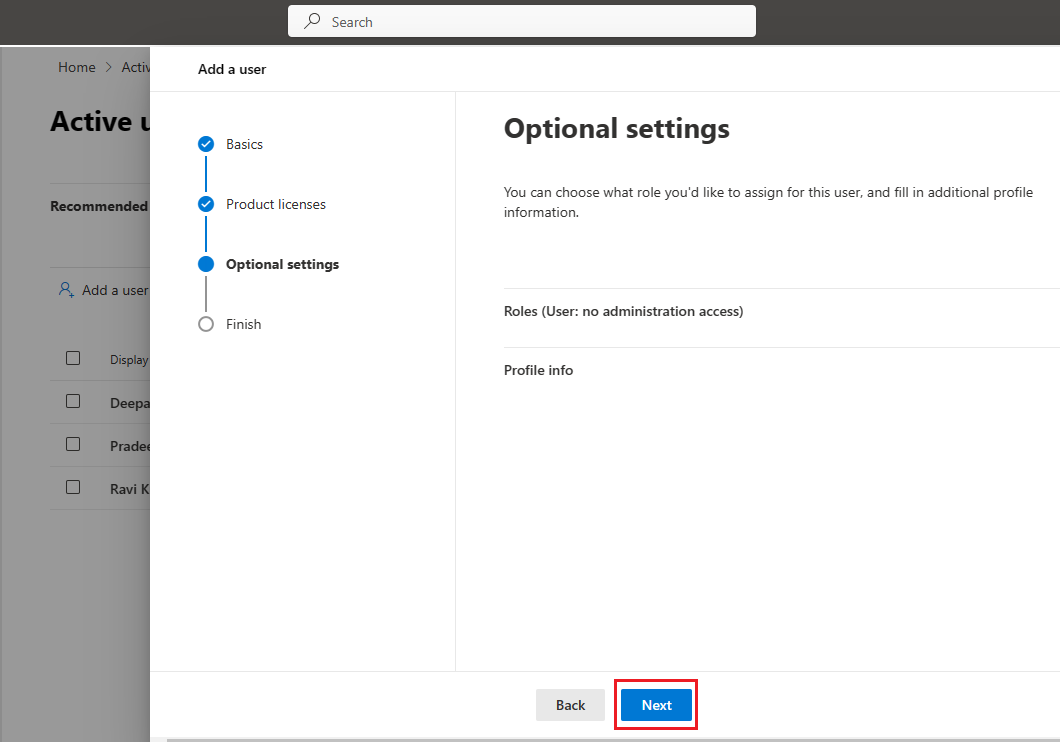
Step 5. Optional settings window will open, if you need to provide admin access to this user then you can select it under roles as shown in the screen otherwise click on the next button.
Step 6. Now Review and Finish window will open, review your details and click on the Finish adding button.
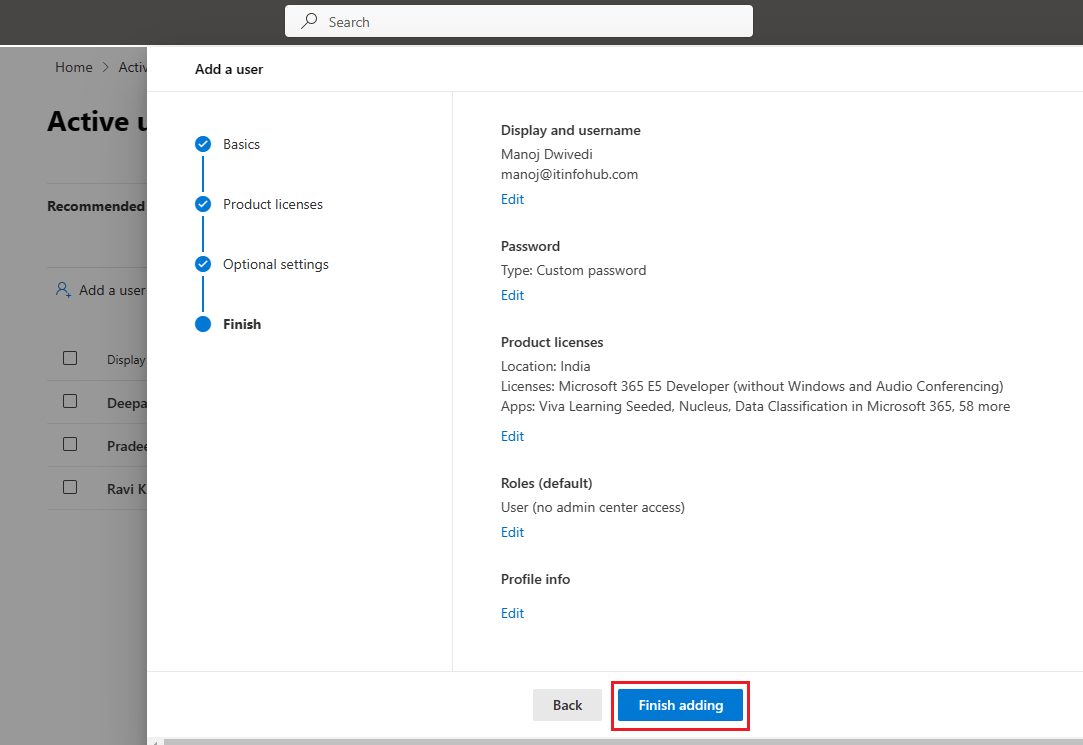
Step 7. It will take a few seconds and you will see a window showing user added to the active users. Click on the close button.
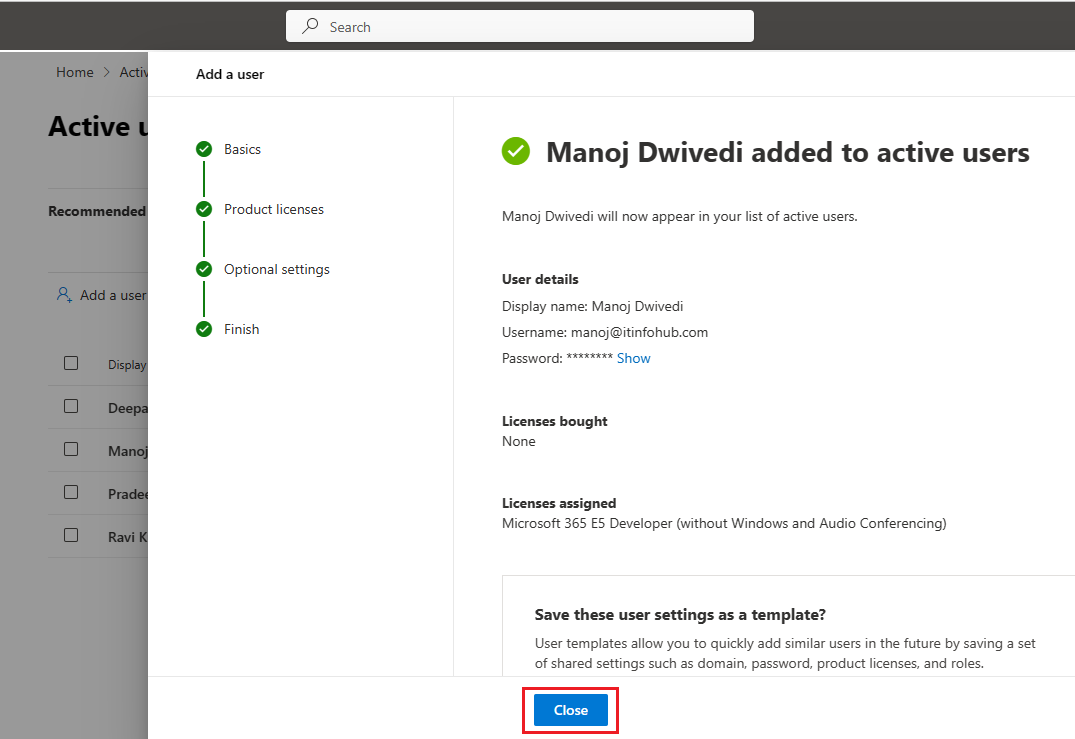
Note: You need to add all active users that you want to migrate and provide the license. Once you have finished adding users, remember to set your default domain as the previous one to complete the office 365 migration process. For that, click on settings, then the domain, and set your default domain from the admin center.
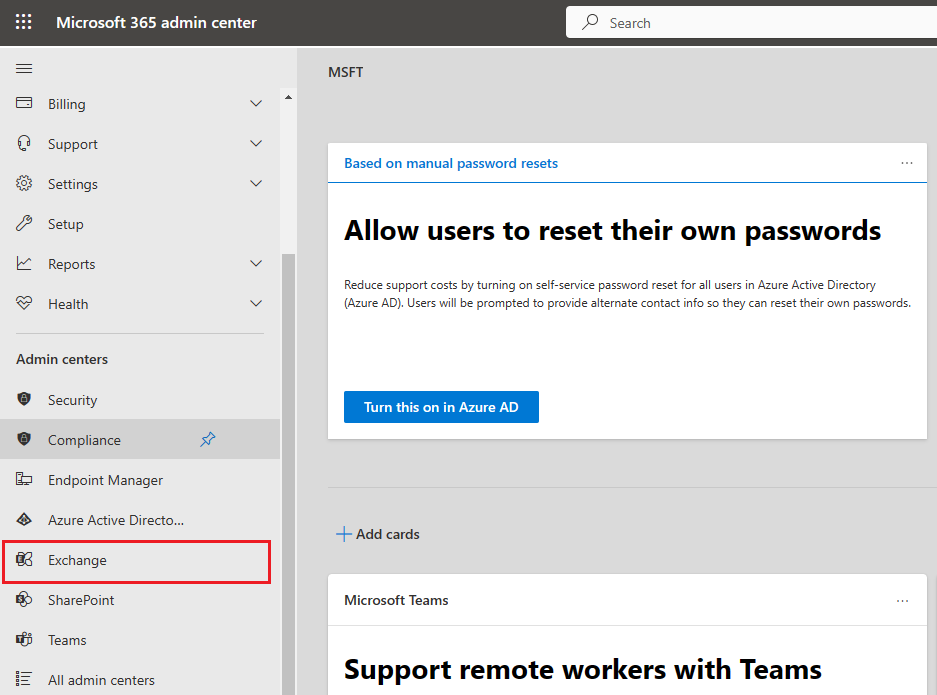
Step 1. Now in the admin center, click on show all and select exchange from the left sidebar.
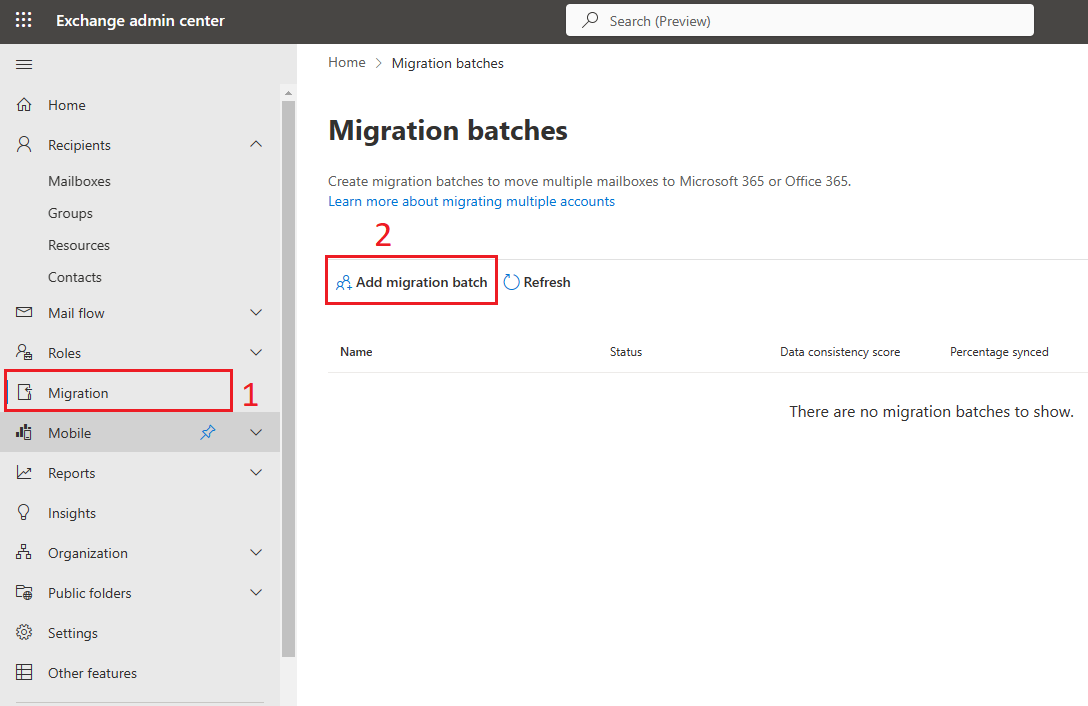
Step 2. After entering into the Exchange Admin Center, click on the migration in the left sidebar and then select add migration batch.
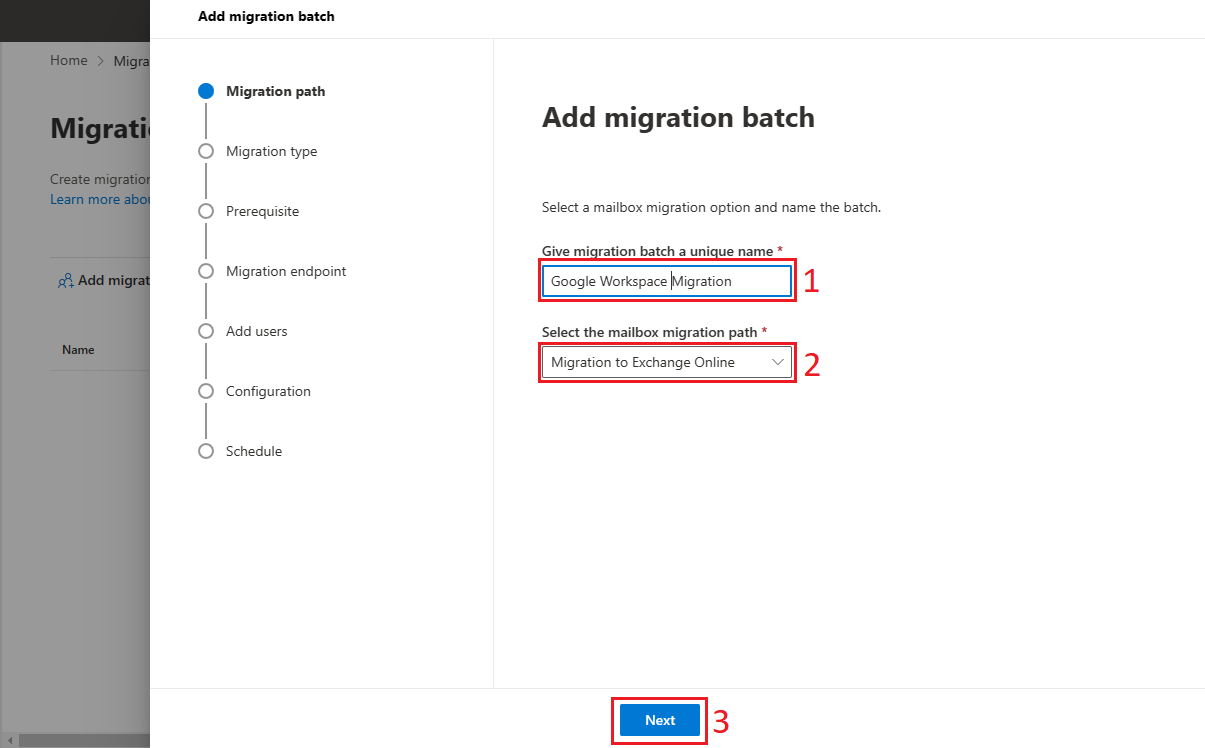
Step 3. Now type migration batch name and in “select the mailbox migration path”, select Migration to Exchange Online and click next.
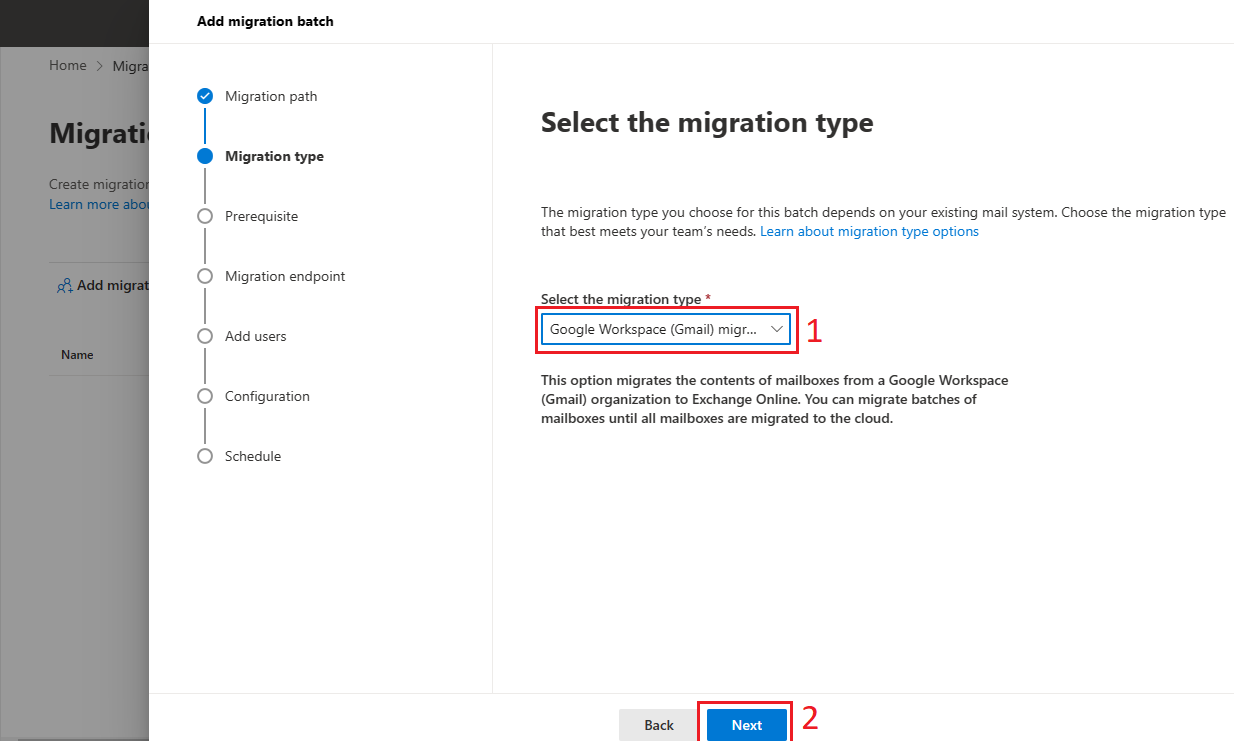
Step 4. In the next screen you need to select the migration type, select Google Workspace (Gmail) Migration and click next to proceed further.
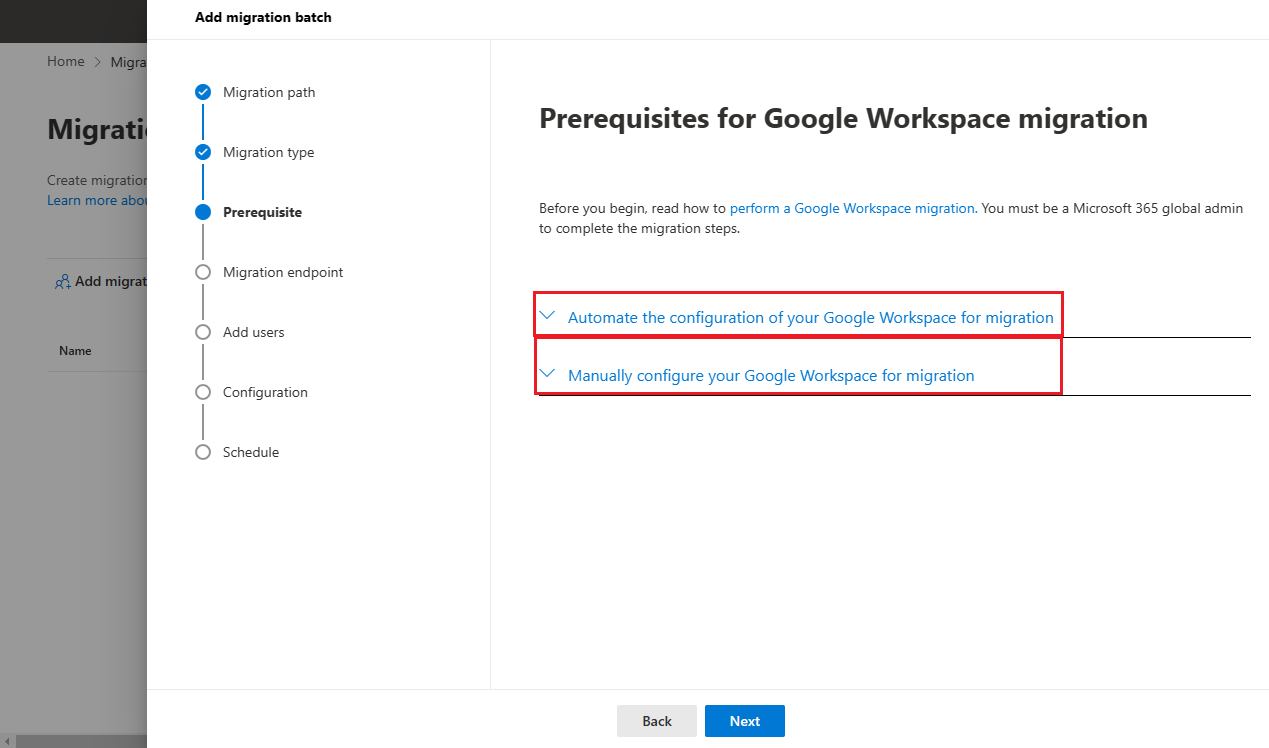
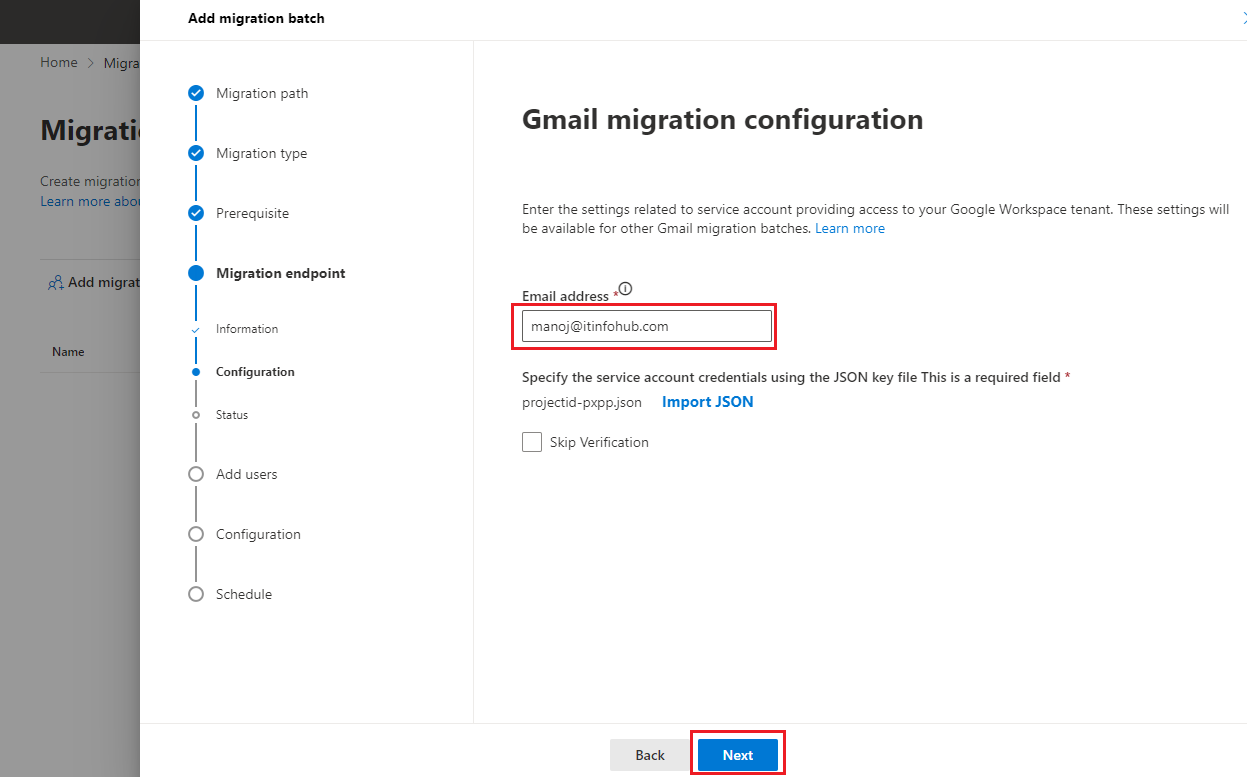
Step 5. Now Prerequisites for Google Workspace migration window will open, and you can perform this using two methods:
Manually configure your Google Workspace for migration.
Now we will see how to configure some prerequisites to migrate from Google Workspace to Office 365.
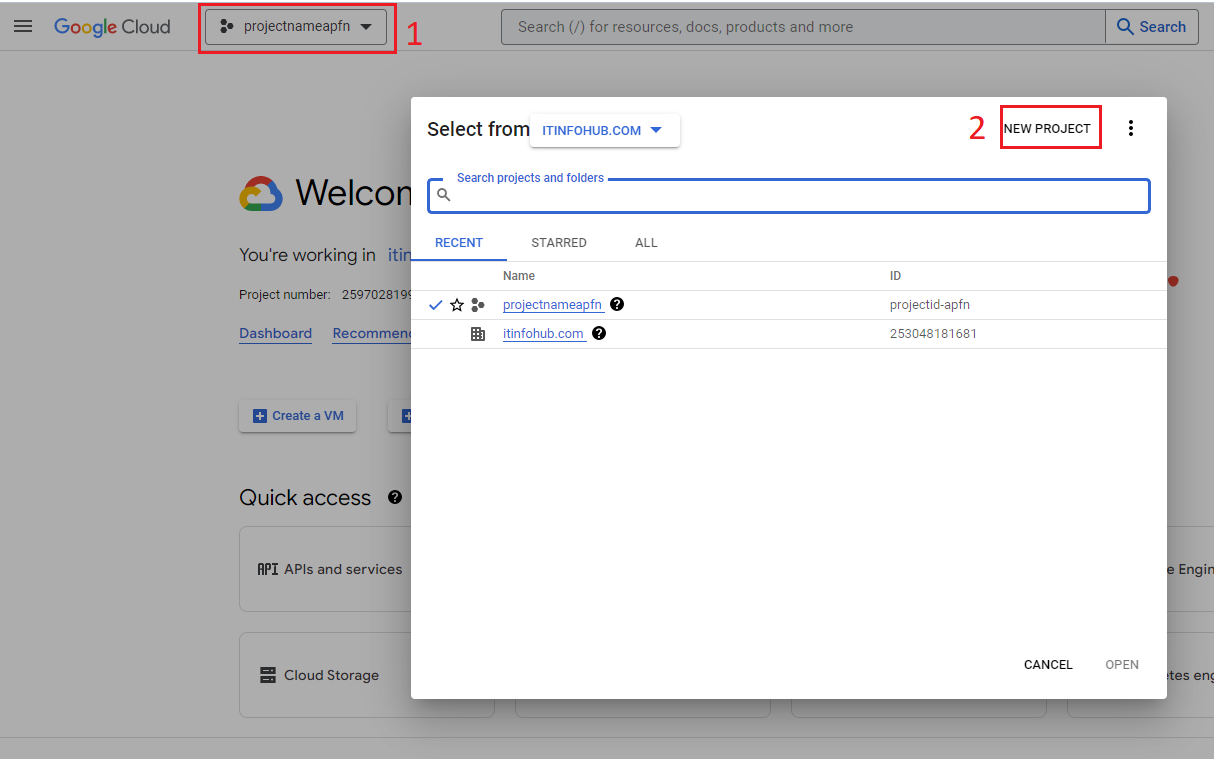
First, open console.cloud.google.com, click on your project and then click on create new project.
Type project name, select your organization and click on the create button.
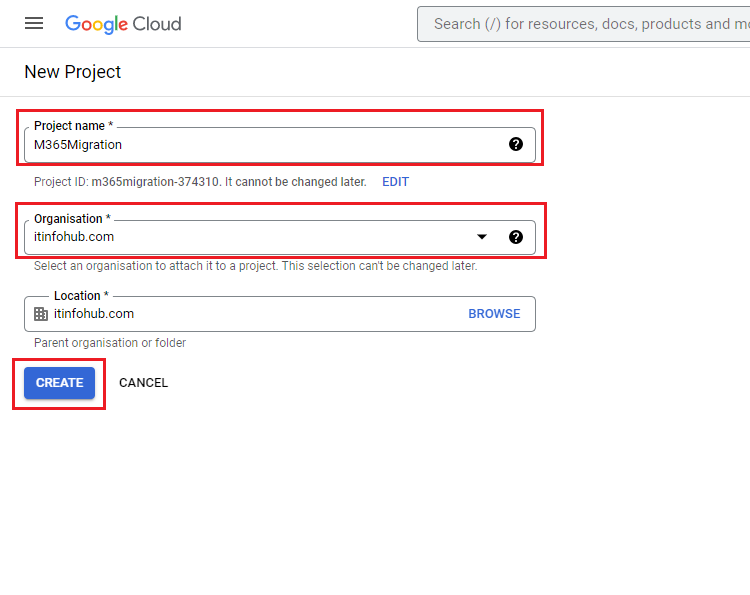
You will receive a notification of project created, click on the select project in the notification bar.
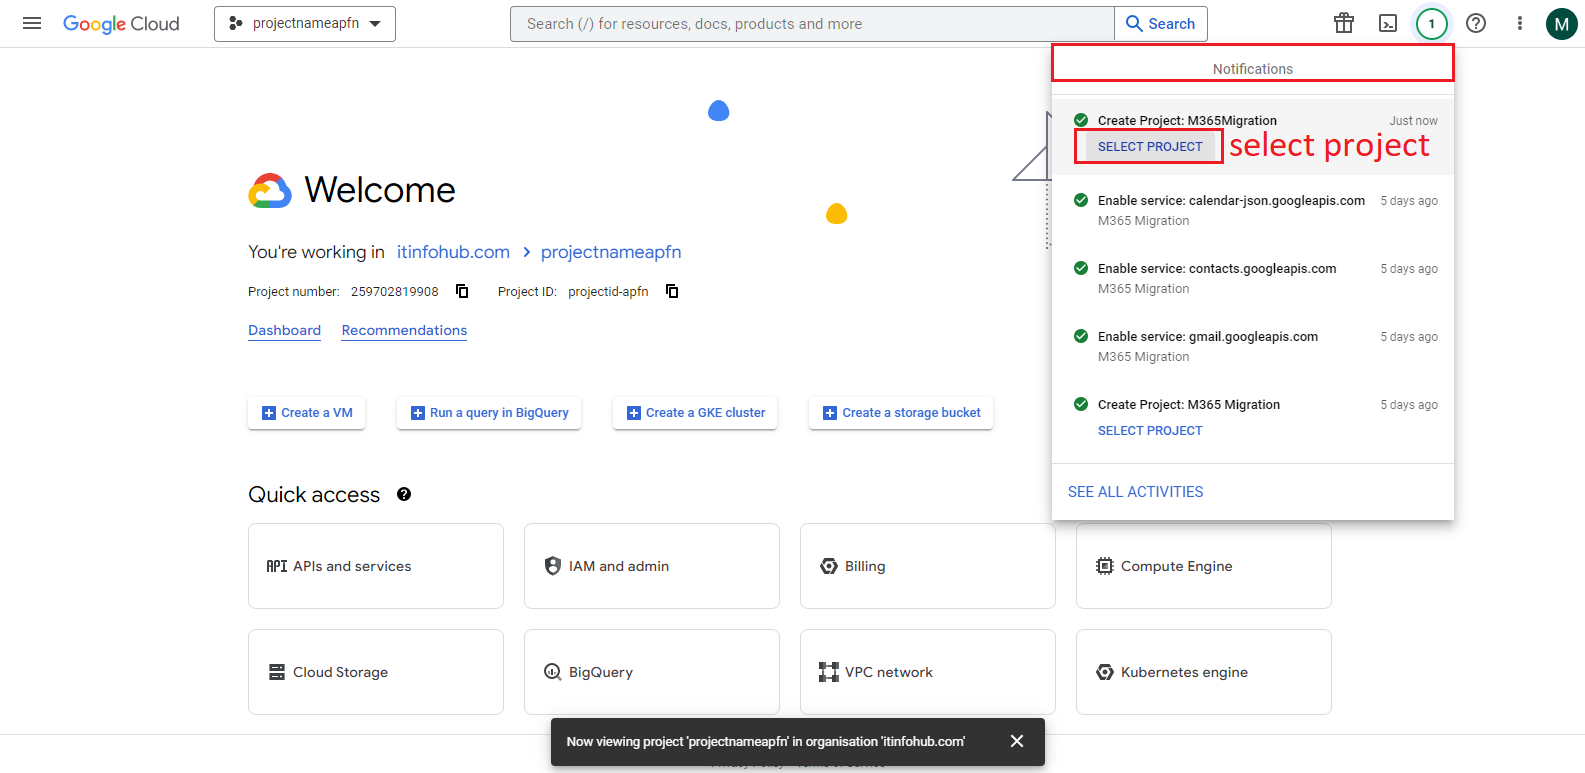
Now you need to create a service account, visit https://console.cloud.google.com/iam-admin and click on Service accounts and then create service account.
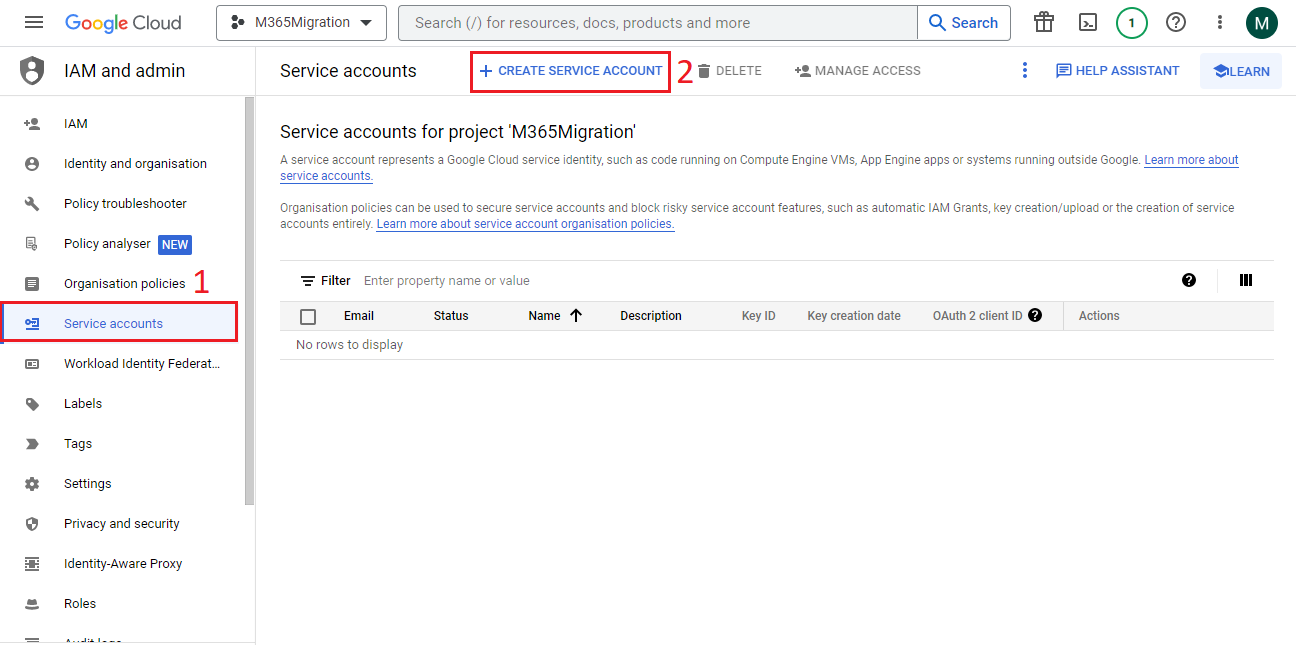
Type service account name and click on the create button.
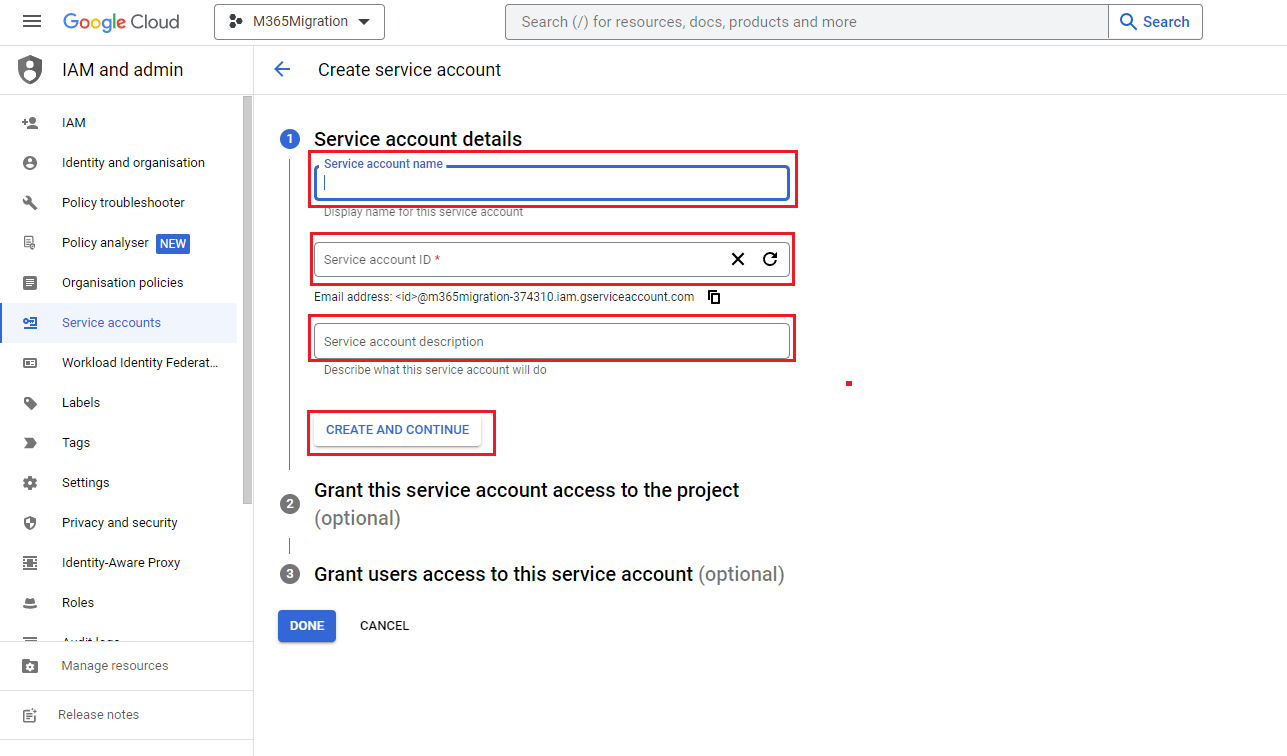
In the next step, it will ask for the role, provide owner role and click on continue, then click on the done button.
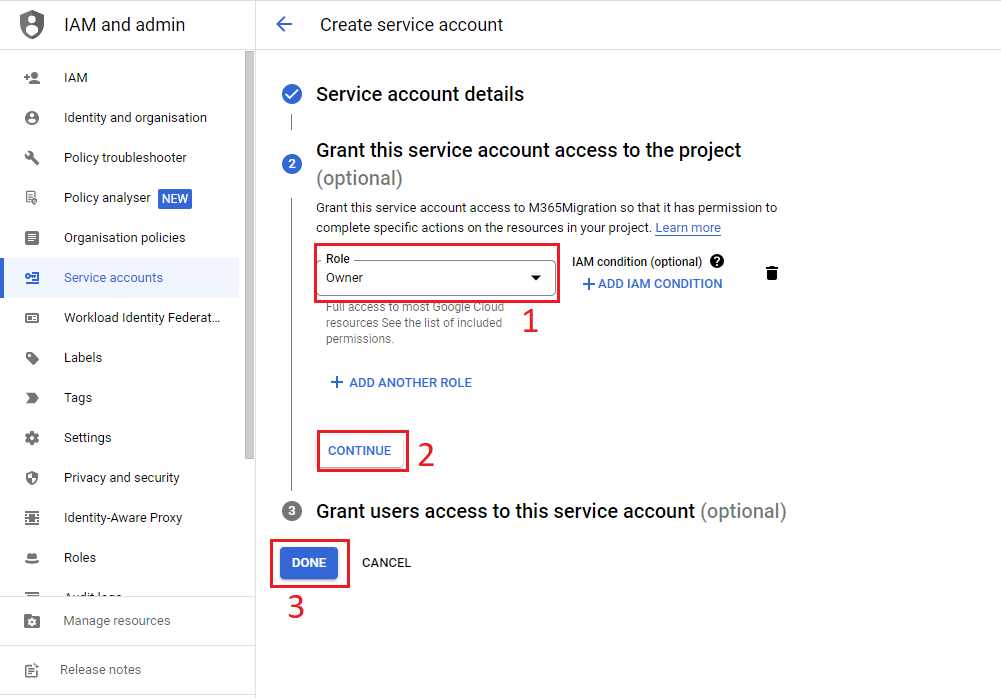
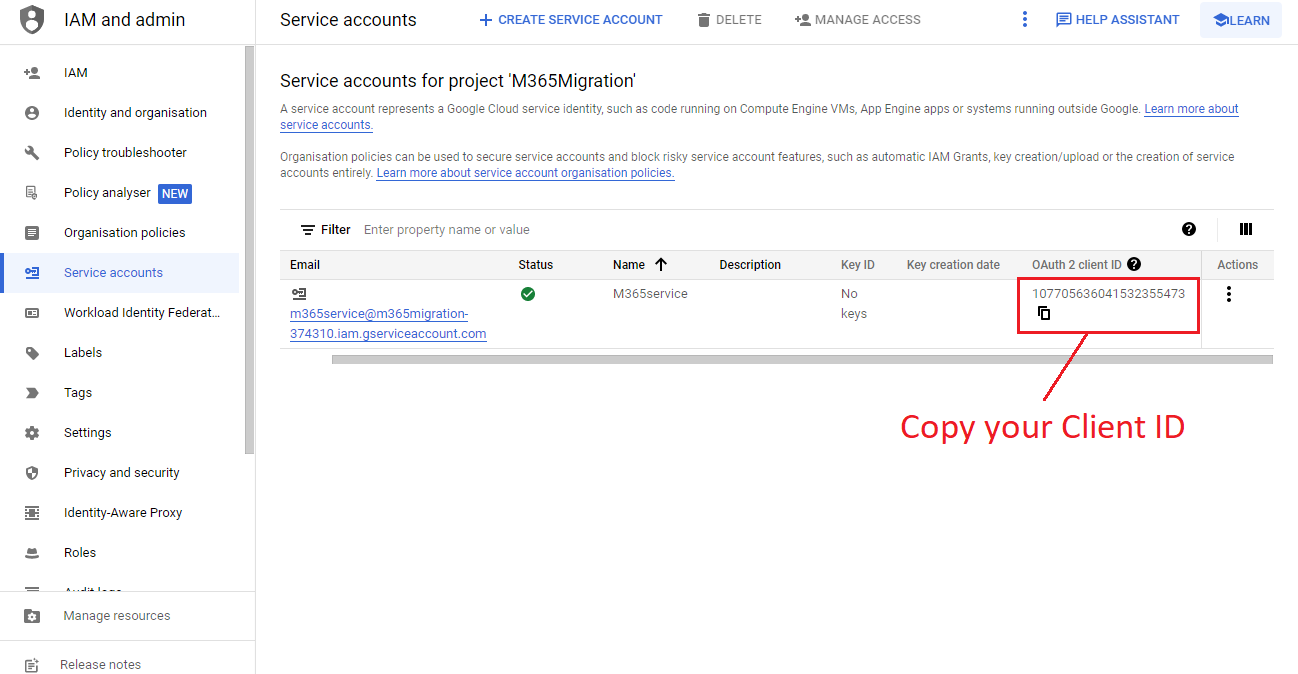
Your service account has been created successfully and a client Id has also generated, copy your client id and save it.
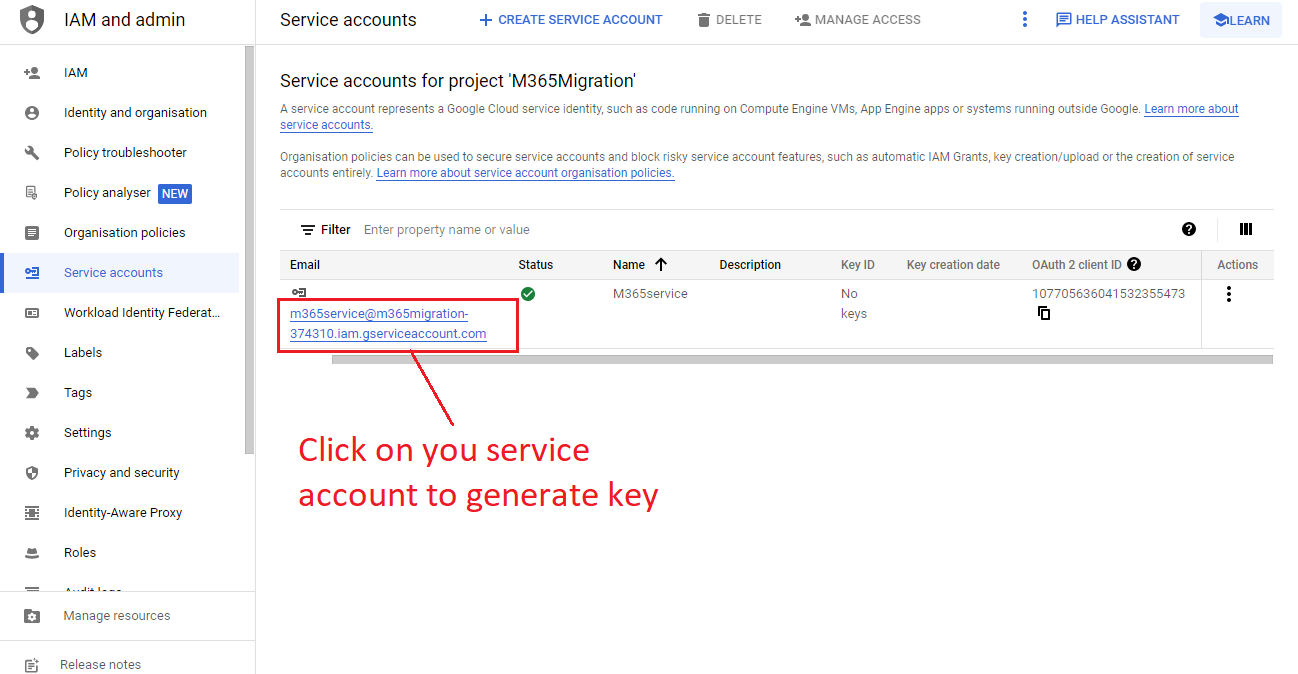
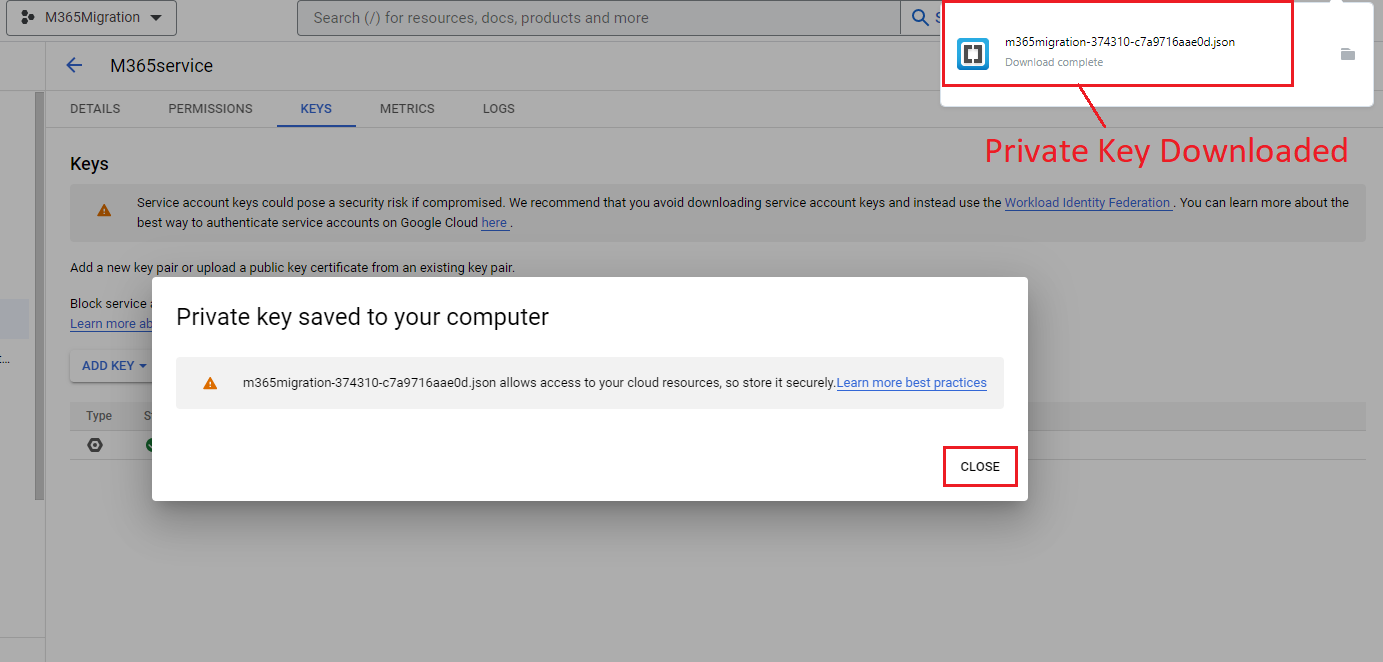
Now you need to create a login credential key (JSON file), click on your service account to create a new key.
Now click on the KEYS tab then choose Add Key, A popup will open asking for the key type, Choose JSON here and then click on create button.
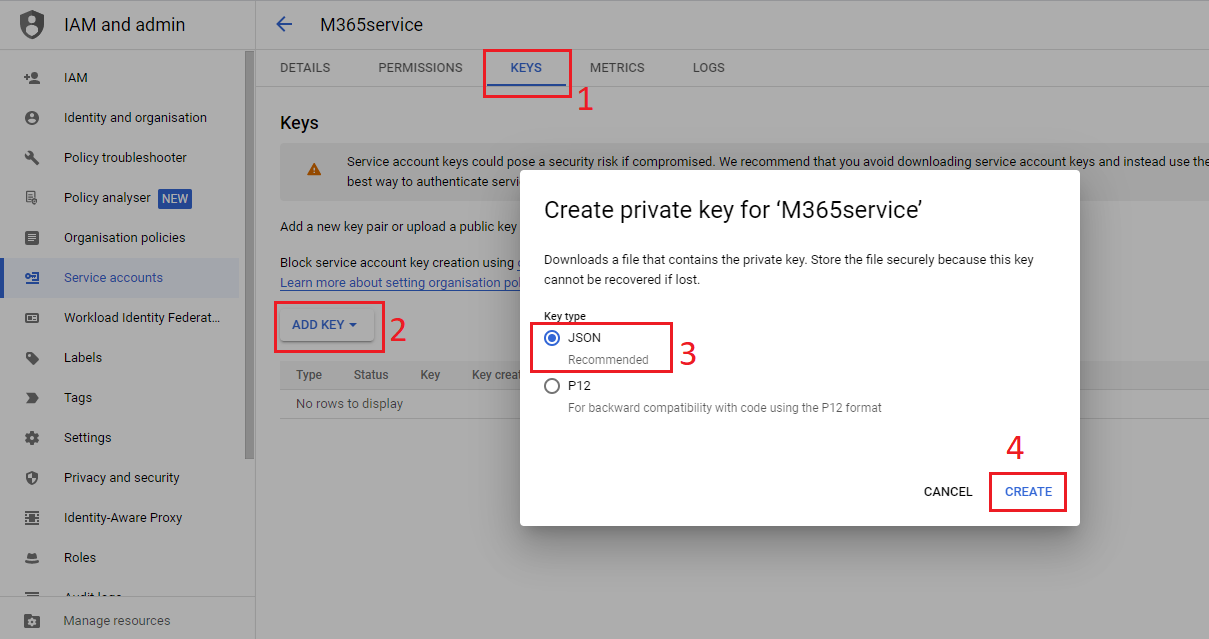
You can see that the Key is generated and downloaded automatically to your computer.
Now you need to provide API permissions for mail, contacts and calendars, For that visit
https://console.cloud.google.com/apis/library, you will see interface like the image below.
Search for Gmail and click on the Gmail API.
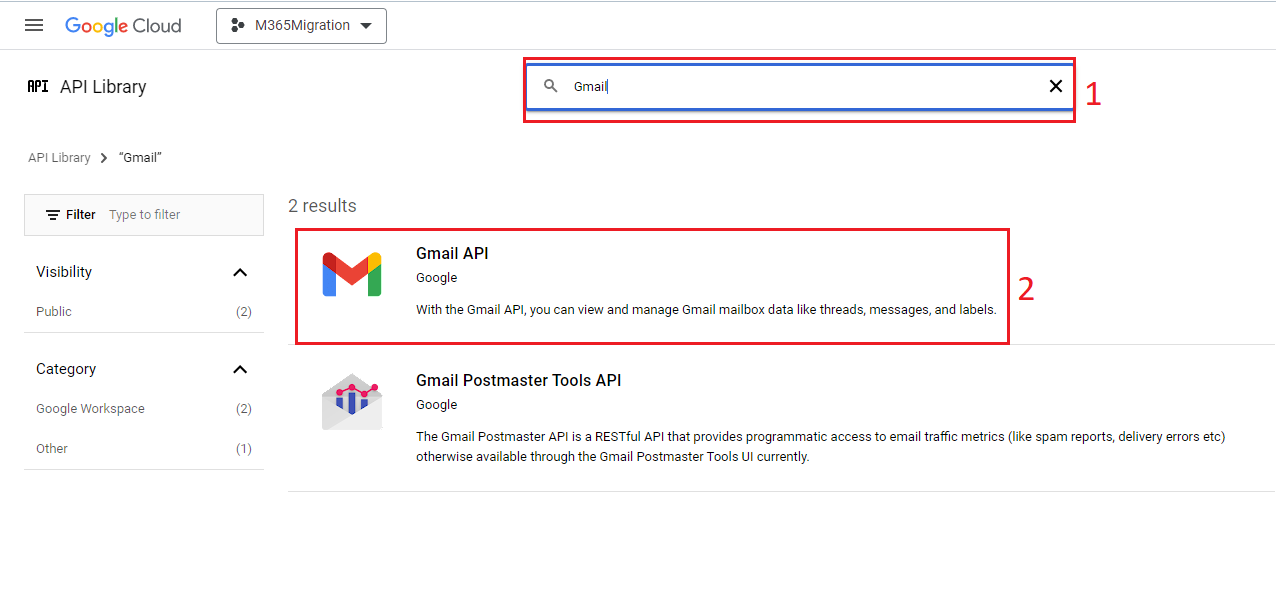
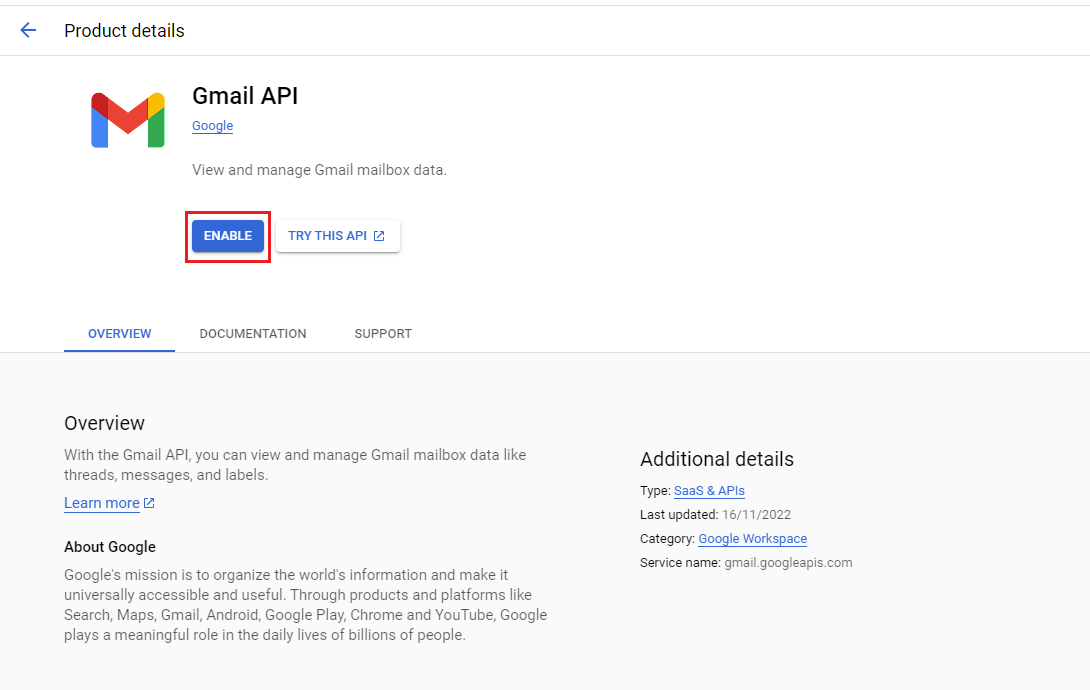
Now click on enable button under Gmail API.
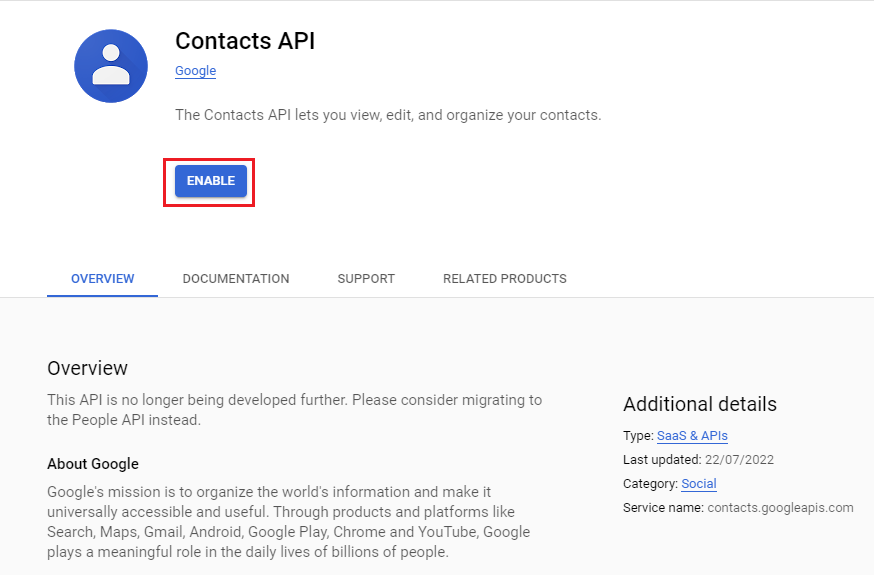
Now search for contacts and enable Contacts API as we had done for Gmail.
Once done for contacts, enable API for Google Calendar.
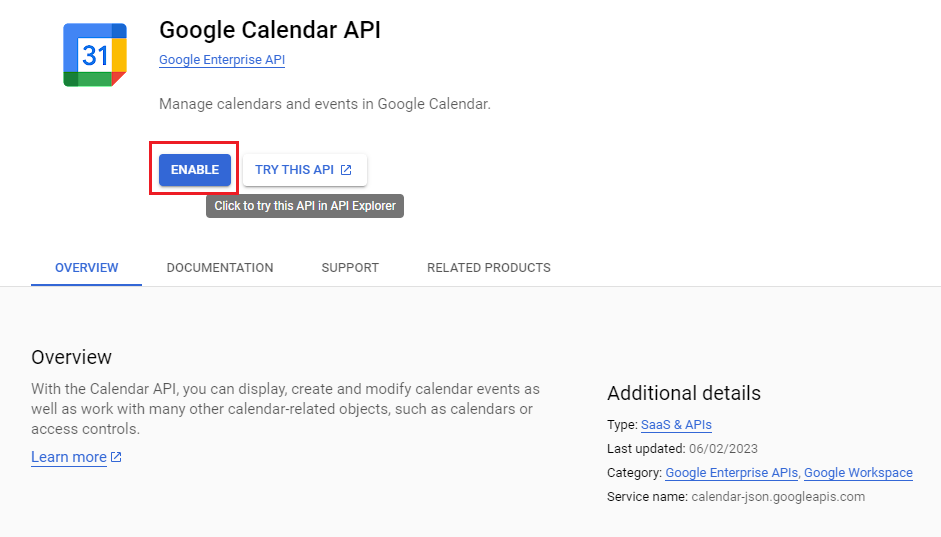
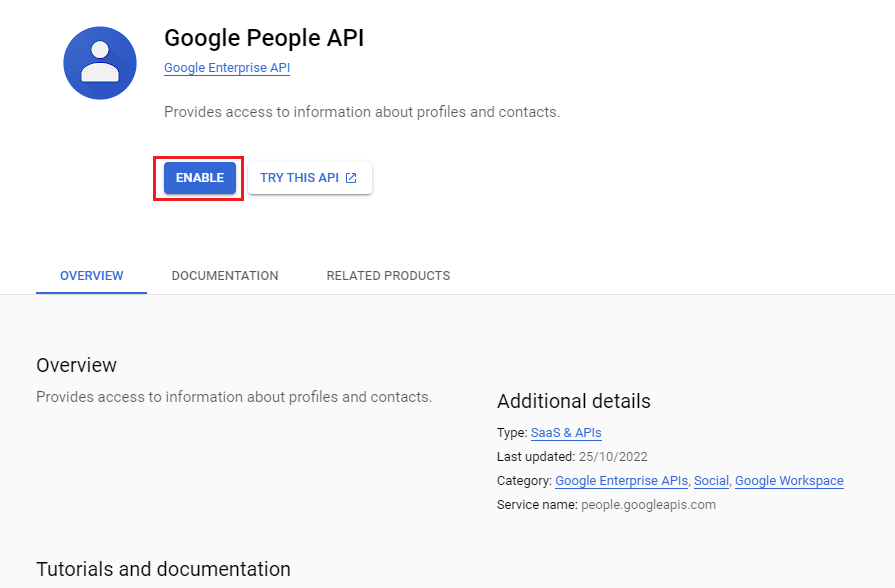
Now search for people and enable People API.
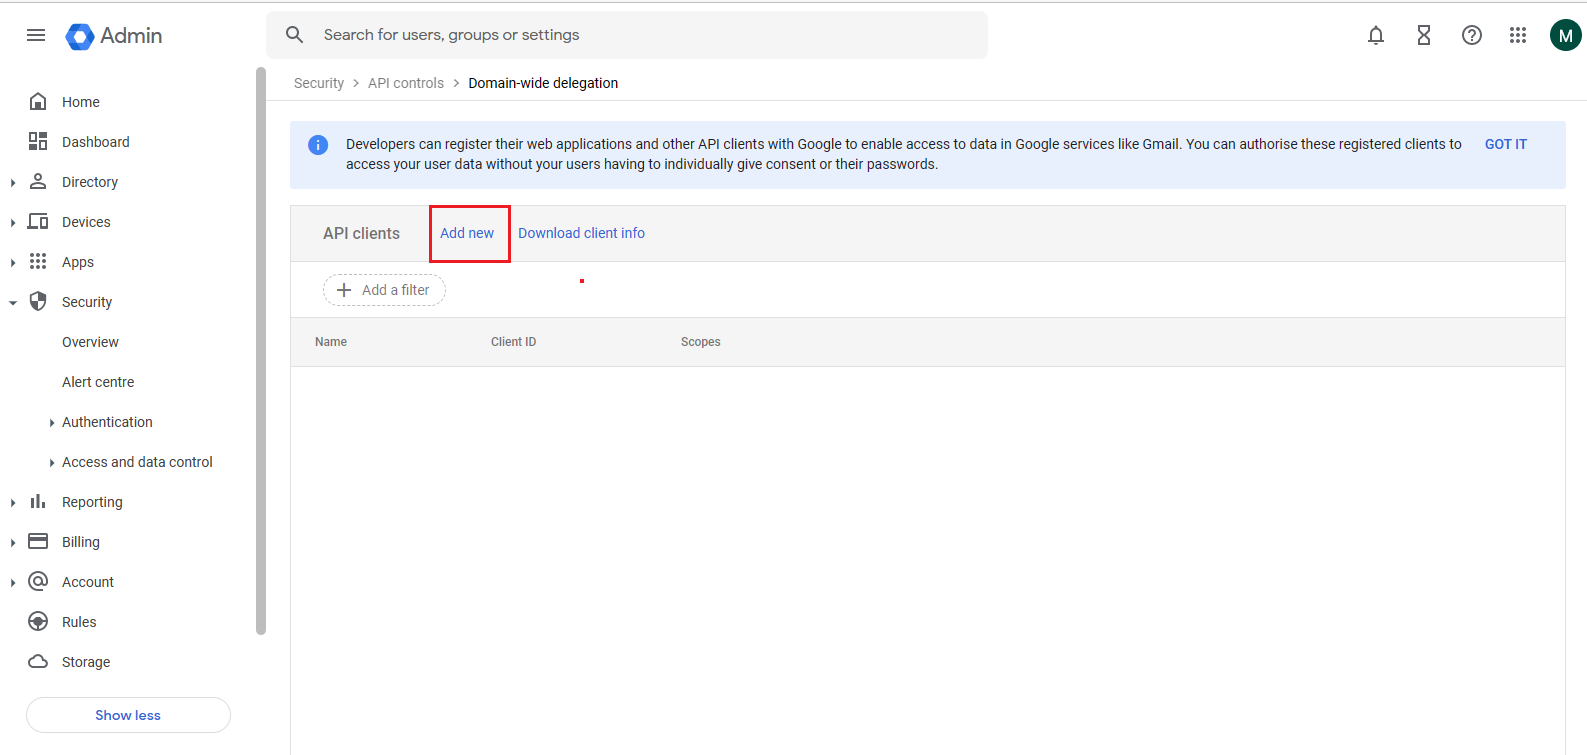
Now you need to provide domain wide delegation, for that visit https://admin.google.com/ac/owl/domainwidedelegation and click on add new button.
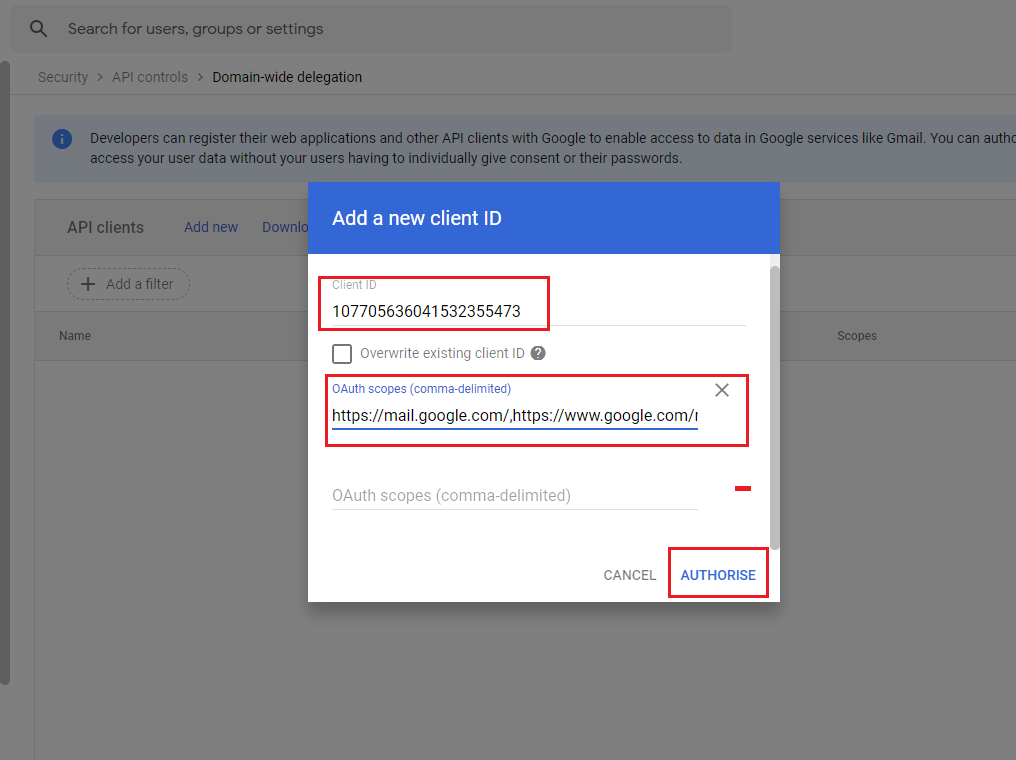
Now enter your client id here and type the scopes here and click on the authorise button.
https://mail.google.com,https://www.googleapis.com/auth/contacts,https://www.googleapis.com/auth/calendar,https://www.googleapis.com/auth/gmail.settings.sharing,https://www.google.com/m8/feeds
Once you have completed all these steps now go back to the Microsoft 365 migration tab.
As we have fulfilled prerequisites for Google Workspace migration, now click on the next button.
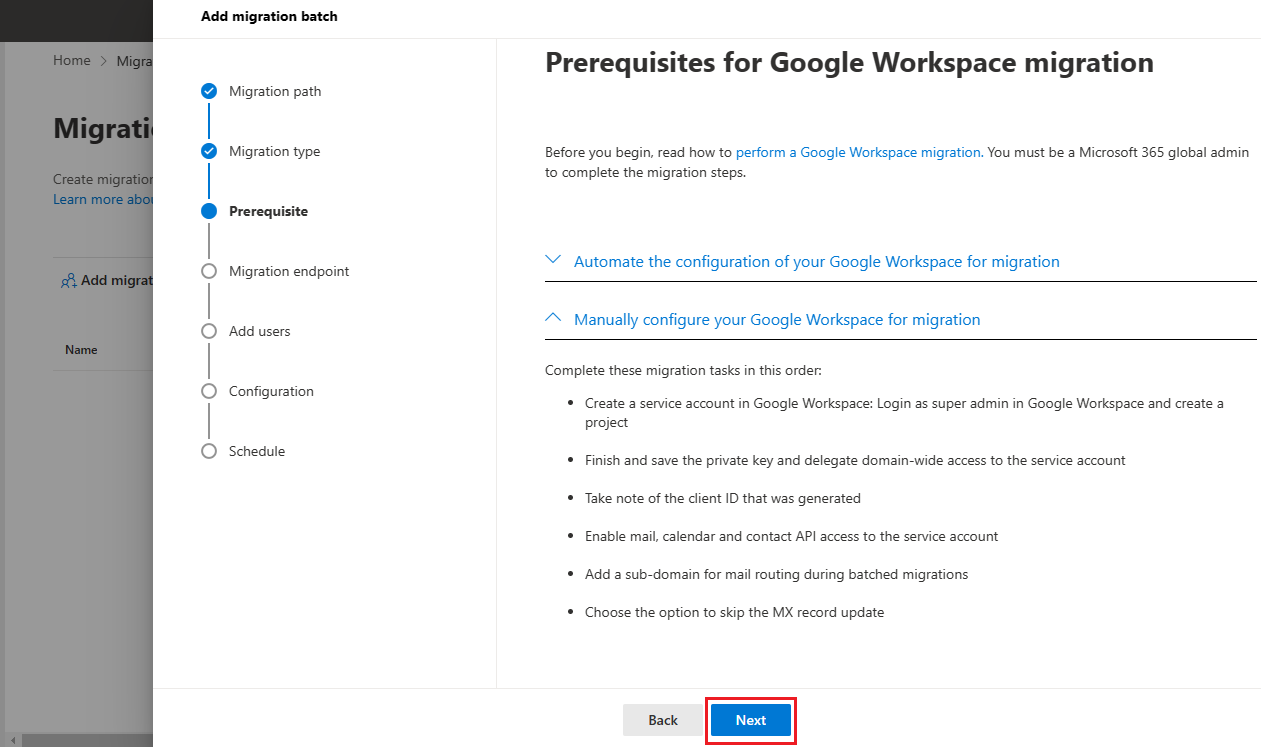
Now Set a Migration Endpoint window will open, select create a new migration endpoint and click on the next button.
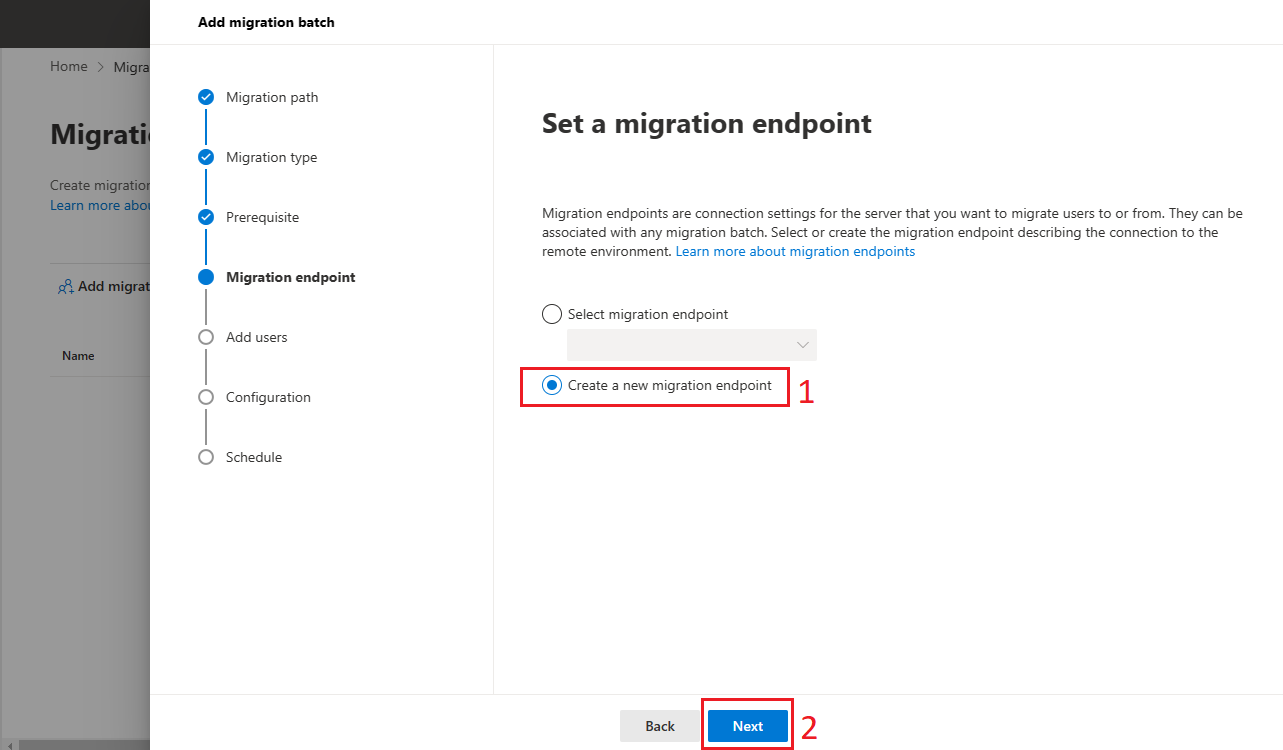
Now in General information window, Type Migration endpoint name and leave the other columns as it is and click on the next button.
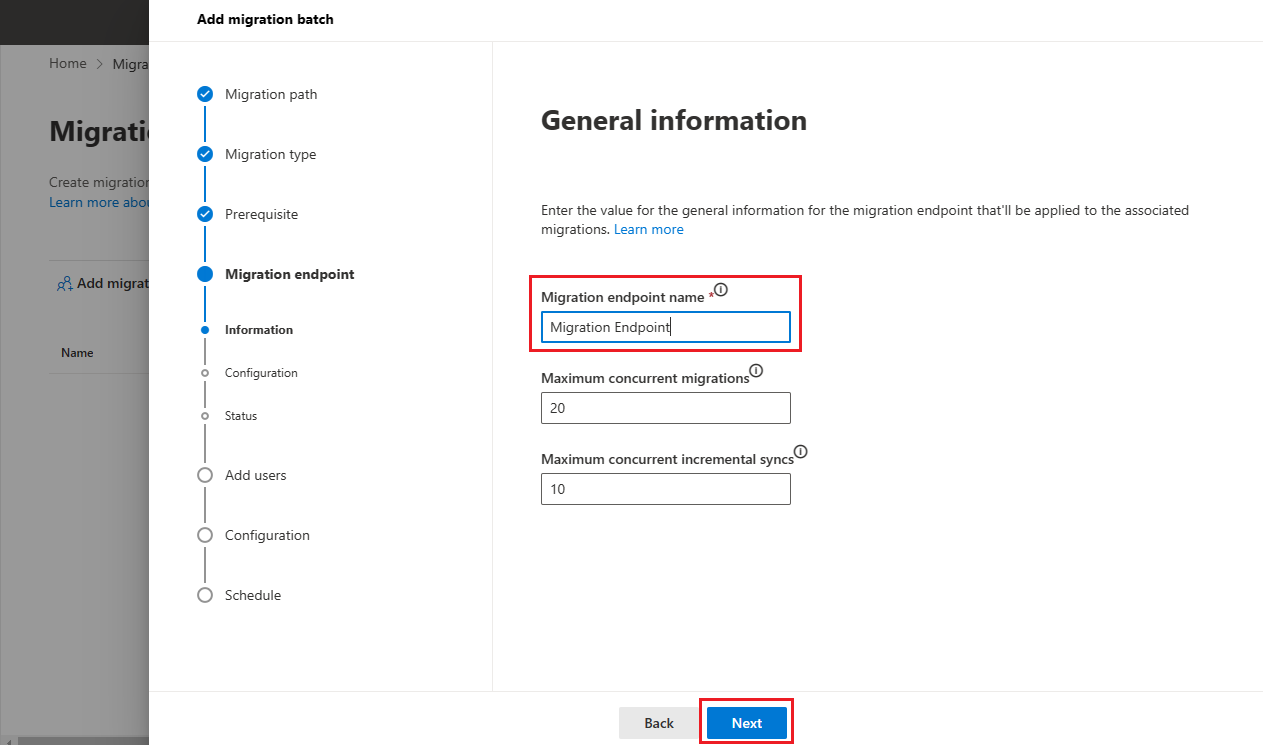
Now Gmail migration configuration window will open, type the email address of the Google Workspace Admin account and import the JSON file which was downloaded earlier and click on the next button.
You can see the New Migration Endpoint created successfully. Click next to move further.
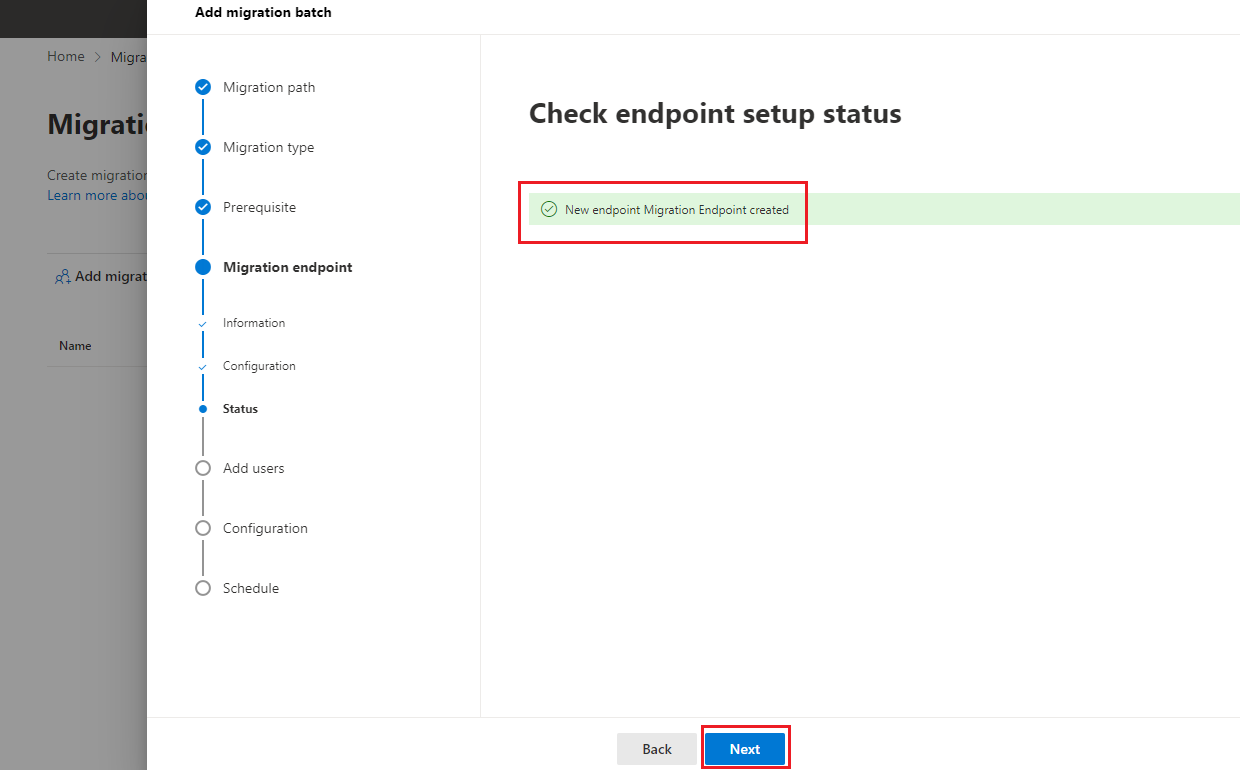
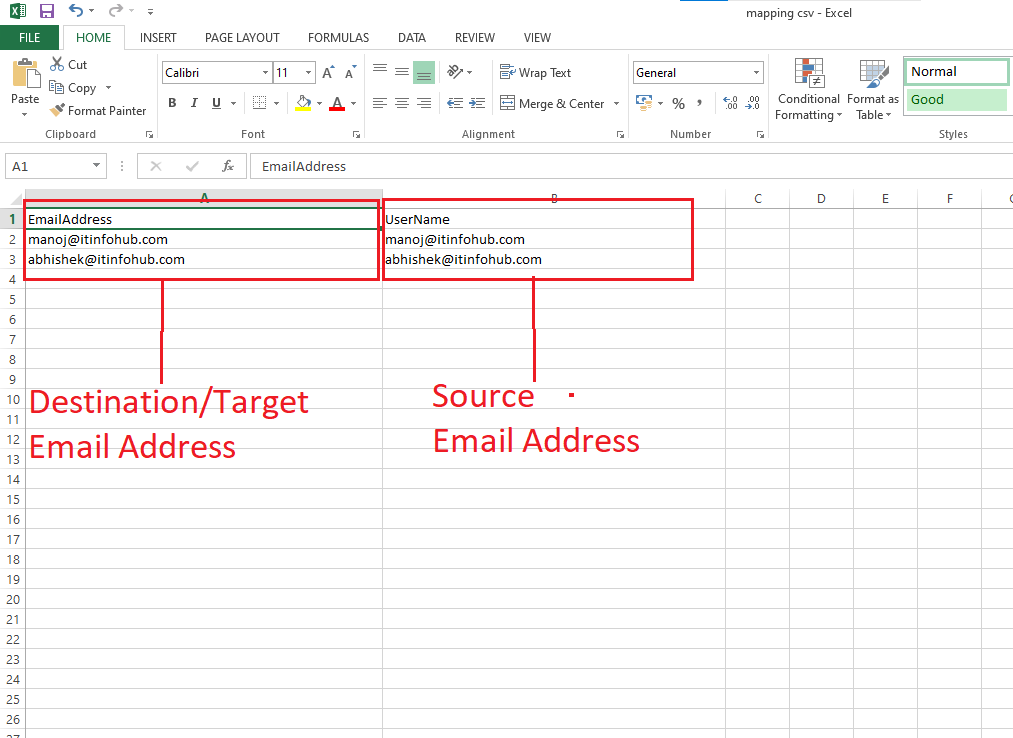
Now you will need a csv file for mapping of the users. Create a csv file as shown in the picture.
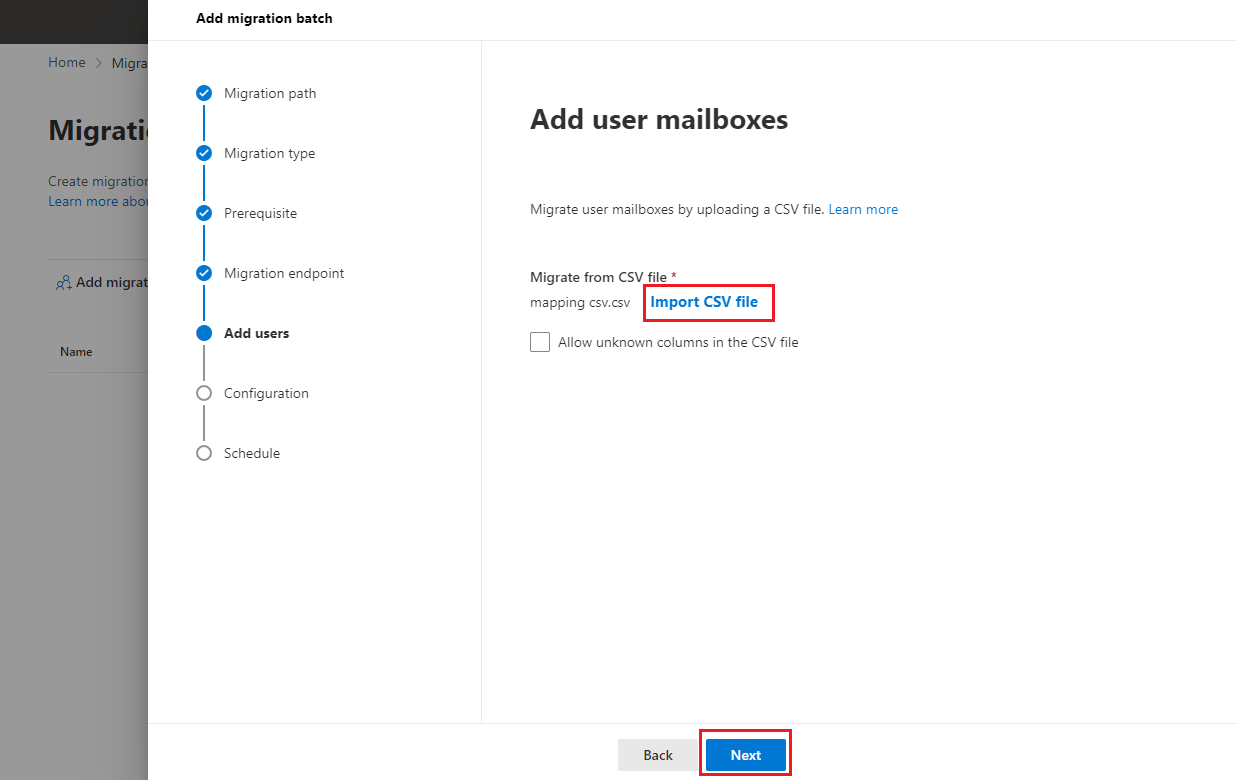
Import you CSV file in this window and click on the next button to proceed further.
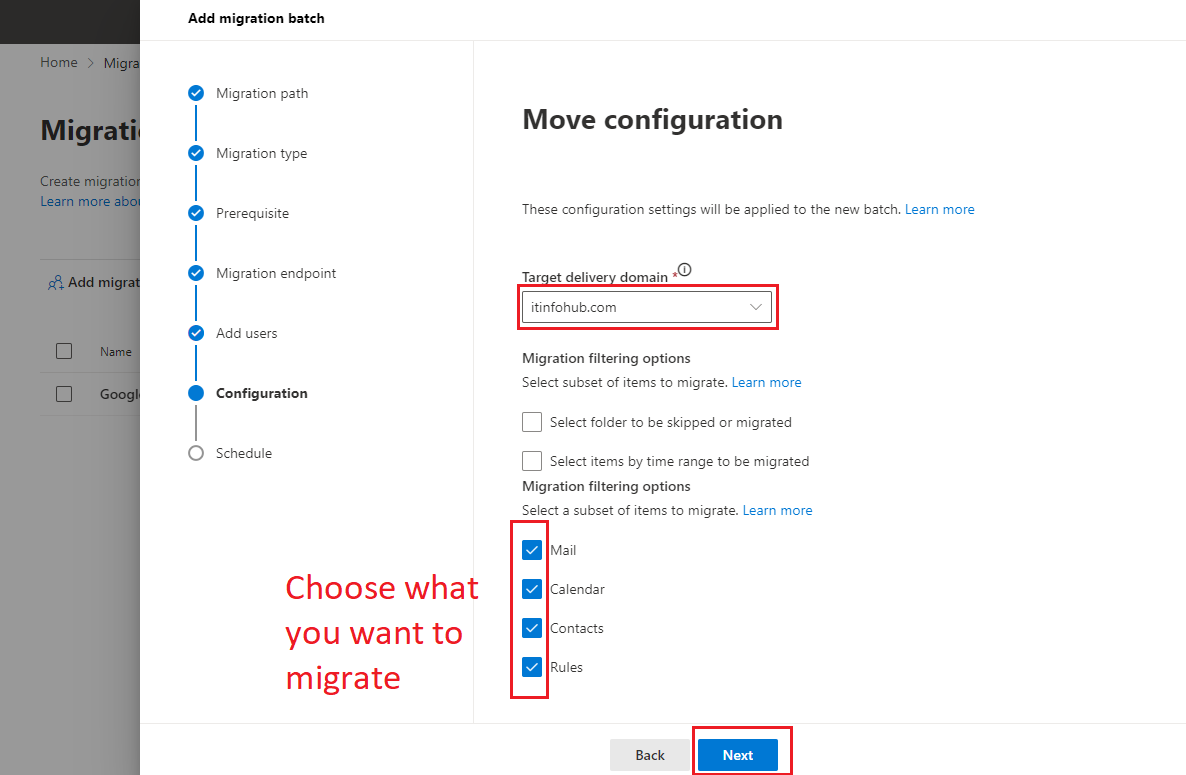
In the move configuration window, type the Target Delivery Domain, and choose what you want to migrate and click on the next button.
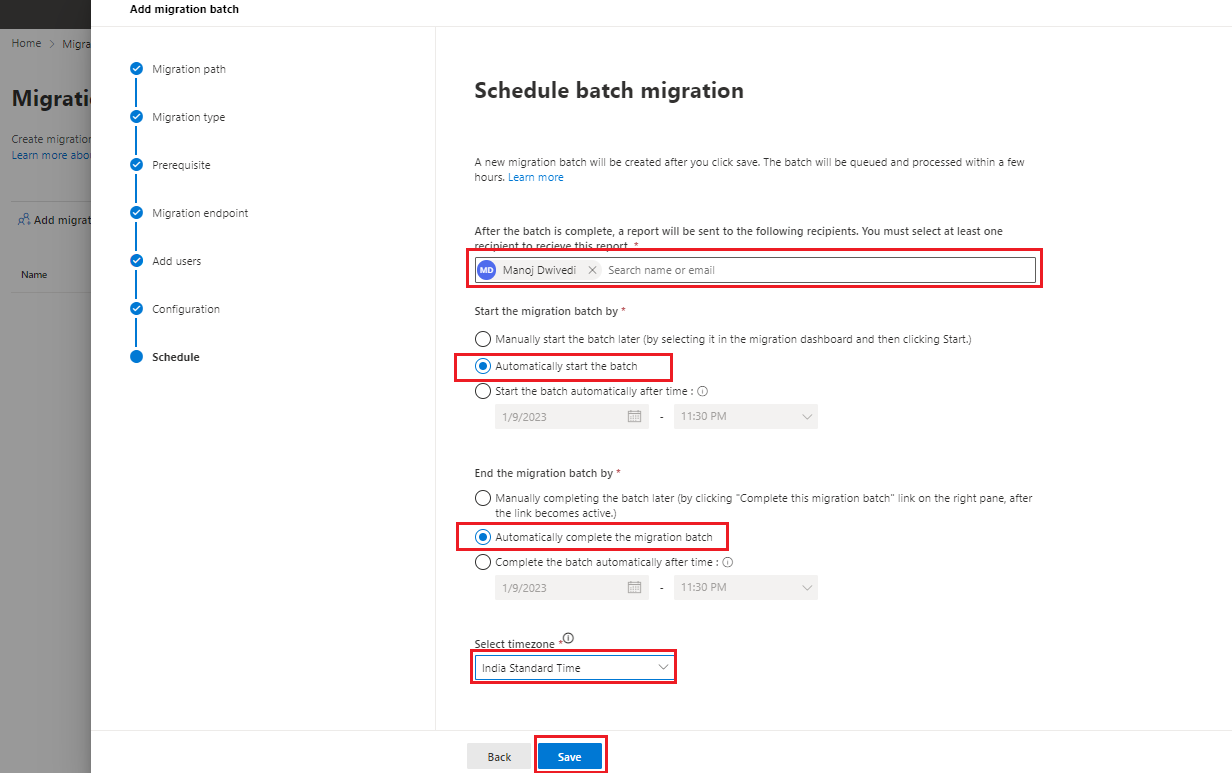
Now Schedule Migration Batch window will open, select users for sending the report. In “start the migration batch by” choose automatically. In “end the migration batch by” choose automatically. Select your time-zone and click on the save button.
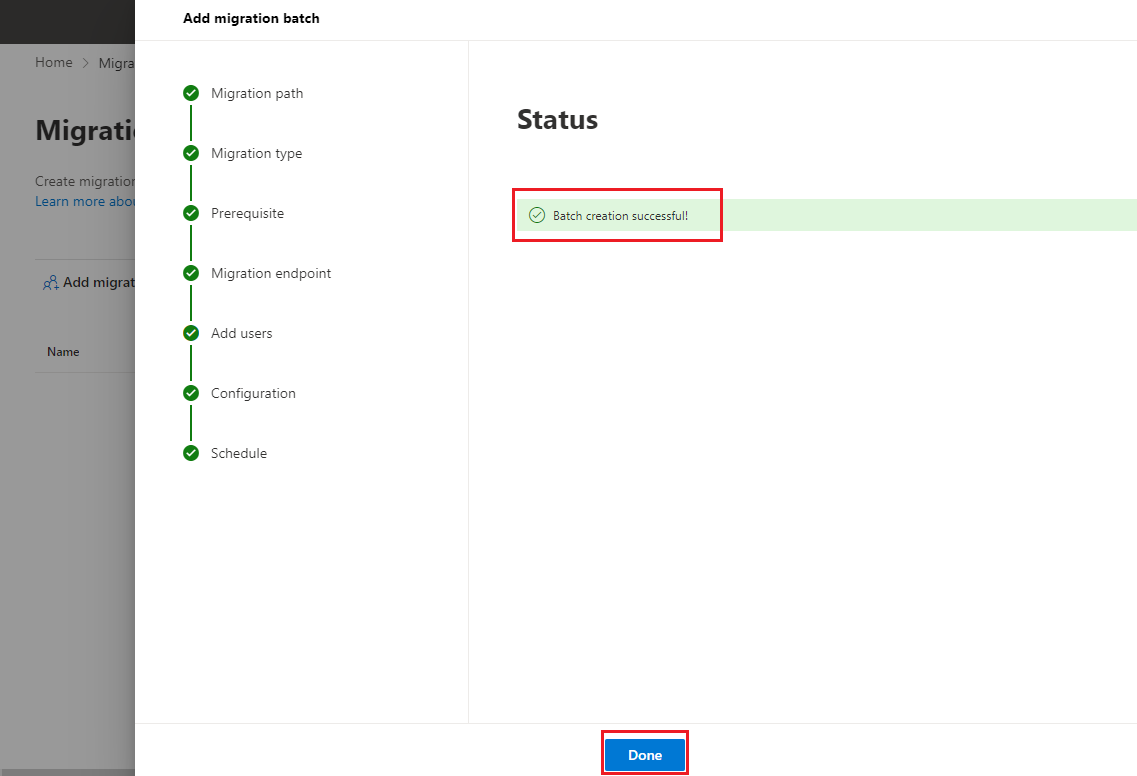
It will take some time and show you the status as Batch creation successful. Click on the done button to move further.
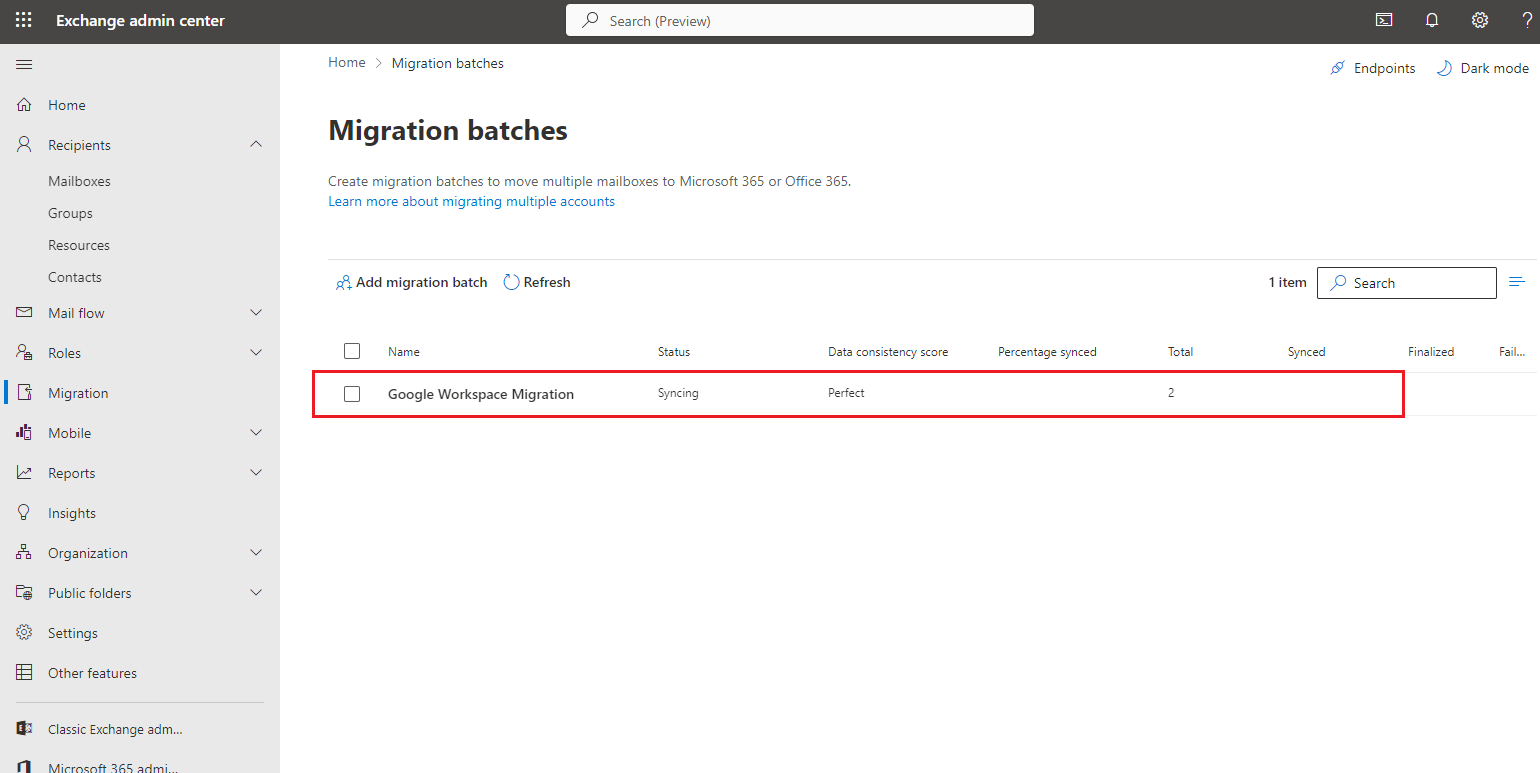
Now you can see the migration batch is created and the status is showing as syncing. You need to wait for some time for the completion.
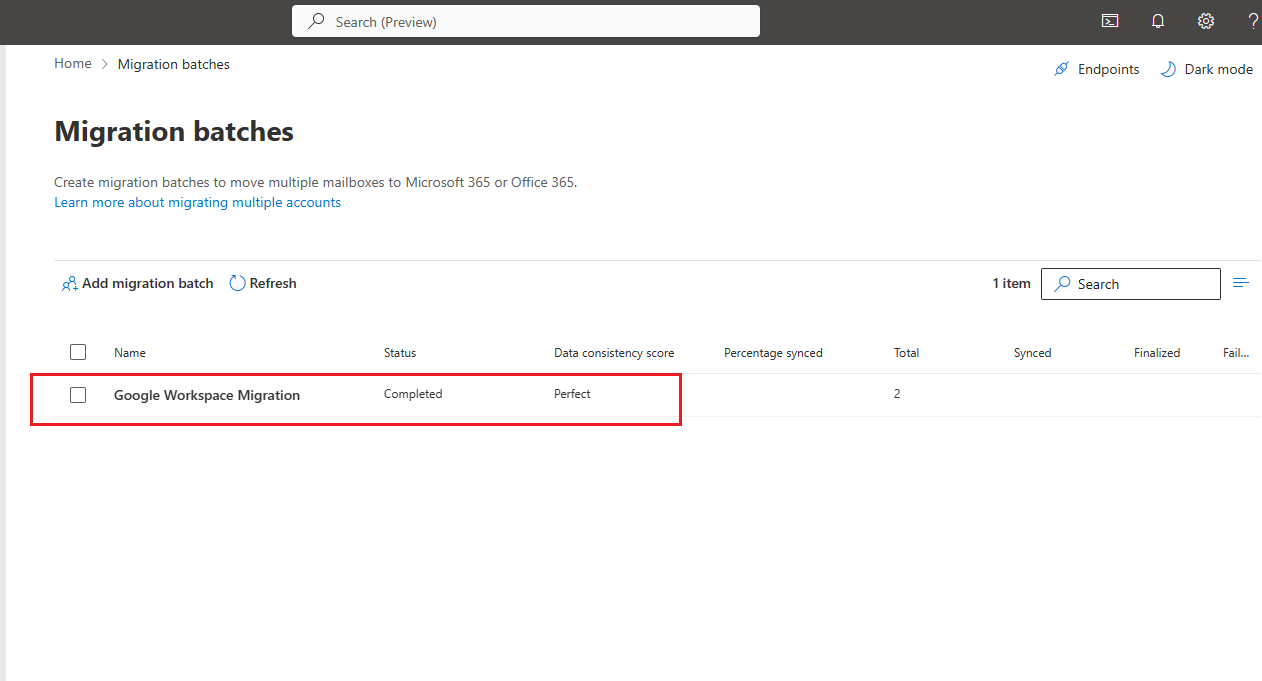
After some time, click on the refresh button to check the status again if the migration batch is synced or not. And you will see the status completed. It will take time depend on your data size.
We have successfully completed Google Workspace to Microsoft 365 migration.